Can a $3000 CNC Router Cut Stainless Steel?
Stainless steel is not the material most people expect to put on a desktop CNC router. That is exactly why I wanted to test it. In this episode of Will It CNC, I used three different approaches to find out whether a desktop machine could etch, engrave, and actually remove material from stainless steel.
The test included a block of 303 stainless steel, a store-bought meat cleaver, diamond drag engraving bits, a carbide end mill, and one intentionally aggressive limit test. The results were better than I expected, but the experiment also exposed where the machine finally reached its limit.
The Test: Three Ways to Machine Stainless Steel
I started with two very different stainless projects. The first was a square block of 303 stainless steel from a machine shop. The second was a meat cleaver that I picked up locally so I could test decorative drag engraving on a real object with a curved, imperfect surface.
The goal was not to prove that a desktop CNC should replace a metalworking machine. The goal was to learn what this machine could realistically do when the workholding, cutter, toolpath, and speeds and feeds were matched to the job.
Attempt 1: Diamond Drag Etching on 303 Stainless
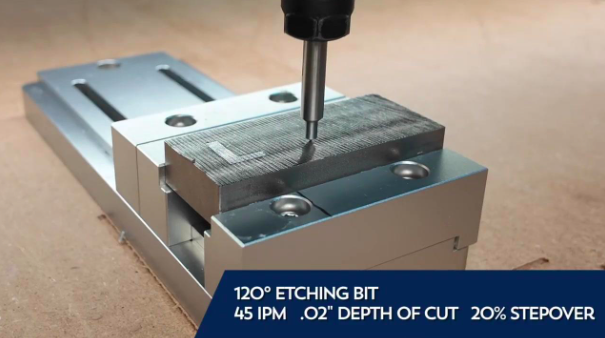
The spring-loaded 120-degree diamond drag bit etching the first stainless test piece.
For the first test, I kept the cutting forces extremely low and used a spring-loaded diamond drag bit. The cutter was a 120-degree MC Etcher. Instead of removing a traditional chip, the diamond point drags across the surface and marks the stainless.
Workholding was the easy part on this test. The stainless block was square, solid, and held in a vise, so the main challenge was getting consistent contact across the top surface.
The first run took about 20 minutes. A very small height difference from one side of the block to the other caused some detail to disappear. I reset the Z height slightly deeper and ran it again. That was enough to bring the missing detail back.
What matters with a spring-loaded engraving bit
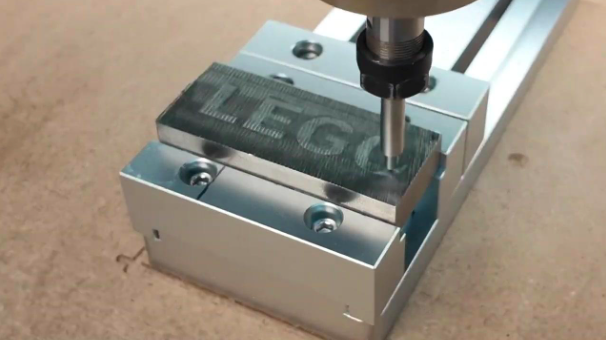
A second drag-etching pass fills in the missing detail on the 303 stainless block.
This behaves differently from a normal end mill. The mark is controlled by the spring pressure, not by thinking in terms of a conventional depth of cut. The bit also has an adjustable spring tension. That matters if you use a tool height setter because it can compress the spring and give you an incorrect Z zero if the spring tension is too light.
The result was a surface etch that looked clean but was shallow enough you could barely feel it. That makes this type of tool interesting for adding designs without aggressively cutting into the part.
Attempt 2: Engraving a Dragon on a Meat Cleaver
For the second attempt, I moved from a flat block to a real object with a much more difficult shape. The project was a store-bought meat cleaver, and the goal was to add a dragon design to the blade.
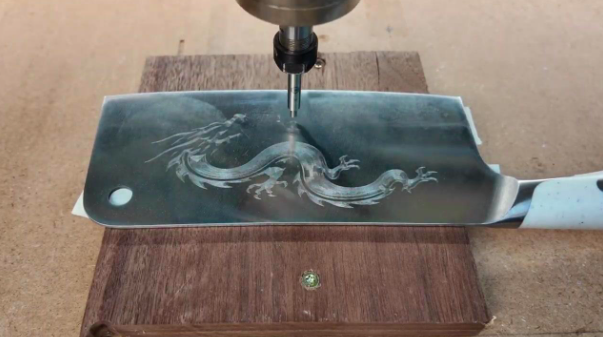
The CNC drag engraving the dragon design directly into the stainless cleaver blade.
The handle prevented the cleaver from sitting flat on the CNC bed, so I attached a walnut cutoff to the machine and used double-sided tape to hold the blade on top of it. That gave the handle enough clearance while keeping the cutting pressure low enough for the tape to work.
Setting the zero was more complicated because the blade was not perfectly flat. There was a slight roll toward the edge, so I knew the cutter could lose contact as it moved across the design. I set the XY position by eye and used the spring-loaded tool to help compensate for some of the Z variation.
I also switched to a 90-degree engraving bit. The sharper point gave me a better chance of getting more visible detail. After the first pass, part of the dragon was lighter where the blade rolled away from the cutter. I reset the Z position lower and ran the design again.
That second pass brought the full dragon into view. The key lesson was that with a spring-loaded drag tool, the number entered as depth is not the same thing as a conventional cutting depth. What really matters is how much pressure the spring is applying as the surface height changes.
Attempt 3: Actually Cutting 303 Stainless Steel
The drag engraving tests were successful, but they did not answer the bigger question. Could a desktop CNC router actually make stainless chips? For attempt number three, I put the 303 stainless block back in the vise and switched from engraving to real material removal.
The cutter was a 1/4-inch solid carbide bit with a 45-degree helix and a ZrN coating. I used a pocketing toolpath and tried to turn the block into a LEGO-style shape.
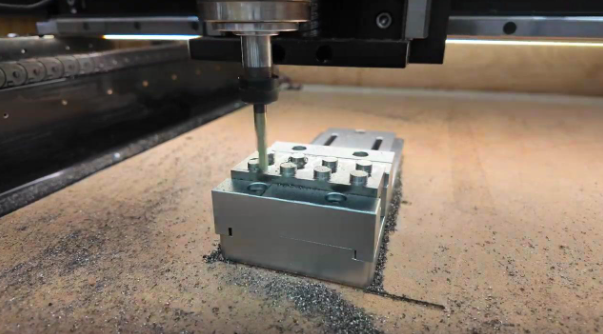
Stainless chips accumulating around the vise during the successful pocketing test.
Starting setup
Bit: 1/4-inch solid carbide, 45-degree helix, ZrN coated
Feed rate: 24 inches per minute
Spindle speed: 10,000 RPM
Plunge rate: 12 inches per minute
Depth of cut: 0.02 inch
Toolpath: pocketing
Starting points only: these speeds and feeds are the settings used in this specific test. They are not universal values. Your machine, cutter, workholding, material, spindle, and toolpath can all change what is appropriate.
The pocketing operation took about 40 minutes, and the machine completed it successfully. That was the point where the experiment changed from an engraving test into proof that the desktop CNC could actually remove stainless steel with a conventional carbide cutter.
The Bonus Test: How Far Can a Desktop CNC Be Pushed?
After the successful pocket, I wanted to find the limiting factor. I set up two profile passes. The first kept the same depth of cut while roughly doubling the speed at a similar chip load. If that survived, the next pass would triple the depth of cut.
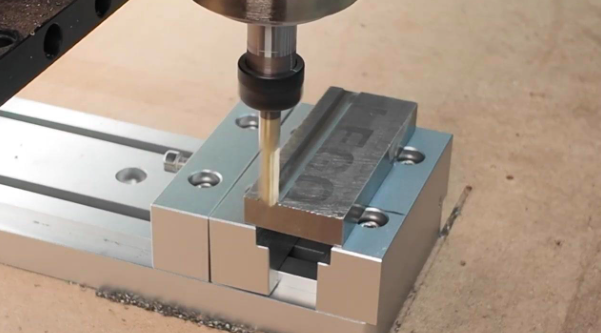
The carbide cutter enters the stainless during the more aggressive profile and slotting test.
This was a much harder test because it involved slotting. In a slot, the cutter is surrounded by material and the chips have very little room to escape. Chip evacuation became critical, so I actively blew the chips out of the cut while watching whether the machine had enough rigidity to keep the tool stable.
The machine handled more than I expected. The slot itself was impressive, and the test showed there was still more capability available beyond the conservative pocketing recipe.
Eventually, the final aggressive pass met the machine's limit and I hit the E-stop. According to the test, the limiting factor was the stepper motors. That was exactly what I wanted to learn: not just whether stainless could be machined, but what component would become the bottleneck when the machine was pushed hard.
What I Learned About CNC Machining Stainless Steel
The answer to the original question is yes. A desktop CNC router can machine stainless steel, but the test also showed that the strategy matters as much as the material itself.
Diamond drag engraving is a low-force way to add designs to stainless surfaces.
Surface height variation matters, even when the difference is very small.
Spring-loaded engraving bits are controlled by contact pressure, so Z zero and spring tension need to be understood together.
A rigid vise made the square 303 stainless block straightforward to hold.
Odd-shaped objects like the cleaver required a raised fixture and double-sided tape for handle clearance.
A carbide end mill successfully pocketed 303 stainless on the desktop CNC.
Chip evacuation became especially important during slotting.
The aggressive limit test ultimately exposed the stepper motors as the bottleneck in this setup.
Why This Opens Up New CNC Project Possibilities
The most useful part of this experiment was not simply proving that stainless steel could be cut. It was seeing several different ways to work with it. A drag engraving setup can add detailed customization to a finished stainless object without removing much material. A conventional carbide cutter can go further and actually machine the material when the setup is right.
That means stainless does not have to be treated as completely off-limits just because you are using a desktop CNC router. The cleaver project showed the customization side of the equation, while the 303 block showed that the machine could produce real chips and real geometry.
Final Verdict: Can a $3,000 CNC Router Cut Stainless Steel?
Yes. In this test, the desktop CNC successfully drag engraved stainless, added a detailed dragon to a meat cleaver, pocketed a block of 303 stainless steel, and survived an aggressive slotting test until the stepper motors became the limiting factor.
My biggest takeaway is that these machines are often more capable than we assume. The difference comes from taking the time to match the cutter, workholding, toolpath, feeds and speeds, and chip evacuation to the material instead of treating every CNC project the same way.
Stainless steel is now one more material on the Will It CNC list, and this test gave me a much better idea of where a desktop CNC can succeed and where the limits start to show.