I have machined plenty of unusual materials on a CNC router, but a pool ball creates a completely different set of problems. It is hard, round, difficult to hold, and I had no idea whether the poly resin would machine cleanly or simply crack apart. So I bought a full set of pool balls and put them through three very different CNC tests.
The plan was to start small by V-carving text on the curved surface, then remove enough material to turn a cue ball into a functional chalk holder, and finally push the material with a 3D relief carve. Along the way I broke a bit tip, chased a CAM mistake, found a piece of metal inside one ball, had a workholding failure, and eventually got results that were much better than I expected.
The Big Question: Will a Pool Ball CNC?
The set I used was labeled as poly resin. I have machined cast resin before, but I did not know how this material would react under a cutter. I also treated the dust as an unknown and wore a respirator during the tests.
The biggest challenge was obvious before the spindle ever turned on: workholding. A pool ball gives you almost no flat reference surface, so every operation had to start with a strategy for keeping a sphere from moving while the cutter applied pressure.
Attempt 1: V-Carving Text on a Curved Pool Ball
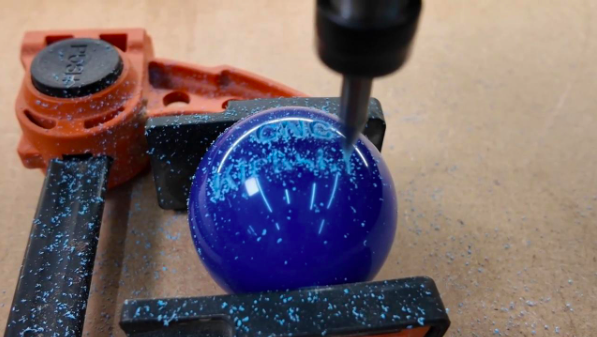
A 30-degree V-bit actively engraving lettering across the curved surface of the pool ball.
The first test was the simplest mechanically. I wanted to know whether the surface could hold crisp lettering without cracking, chipping, or blowing apart. Because this was a light engraving operation, I used a 30-degree V-bit and a clamping setup that captured the ball without relying on double-sided tape.
Starting setup
Bit: 30-degree V-bit
Spindle speed: 20,000 RPM
Feed rate: 30 inches per minute
Plunge rate: 20 inches per minute
Toolpath: V-carving projected onto a 3D model
Starting points only: these speeds and feeds are the settings used in this specific test. They are not universal values. Your machine, cutter, workholding, material, spindle, and toolpath may require different settings.
The first bit machined the resin, but I believe the tip broke during the carve. I ran the same program again with another 30-degree V-bit, this time from Whiteside, and the result improved immediately. The lettering stayed intact and the ball did not crack or disintegrate.
The Vectric Trick That Makes Curved-Surface Text Possible
The important CAM step was not treating the ball like a flat board. In Vectric, I modeled the top half of the ball as a 3D surface, selected the text, created the V-carving toolpath, and enabled Project toolpath onto 3D model. With that option checked, the toolpath follows the contour instead of remaining on a flat plane.
This is still a three-axis machine, so the V-bit approaches the surface vertically rather than staying perfectly perpendicular to every point on the sphere. Even with that limitation, the finished text stayed surprisingly even across the curved surface.
Attempt 2: Turning a Cue Ball Into a Chalk Holder
Engraving proved that the material could hold detail, but attempt two asked a much harder question: could I actually remove a meaningful amount of material and make the pool ball into something functional?
The idea was to turn a cue ball into a billiards chalk holder. That meant facing one side flat, flipping the ball, and machining a pocket on the opposite side deep enough to hold square pieces of chalk.
The first pass immediately proved that the material could be cut, but the CAM file was wrong. Instead of clearing the full area I wanted, the toolpath only opened up the center. I went back to the file, widened the operation, and still did not get the flat surface I expected.
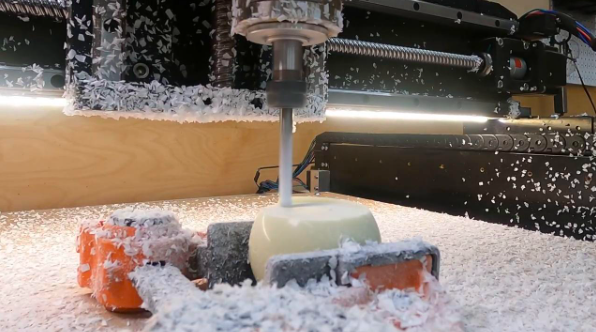
Facing the first side flat so the cue ball has a reliable reference surface for the second setup.
The problem turned out to be a stray pocket allowance value. A quarter-inch allowance had been left in the toolpath, which was preventing the cutter from reaching the intended pocket boundary. Deleting that value fixed the toolpath.
Once the bottom was flat, the setup became much easier. I could flip the cue ball, reference the newly machined surface, and know that the top pocket would line up consistently with the bottom.
The poly resin machined a lot like the epoxy resins I have cut in the past. It made a huge mess, the chips stuck to everything, and the rooster tails coming off the cutter were impressive. More importantly, the workholding held up even though it looked like it should not have worked.
I also added dog-bone fillets to the pocket corners. A round CNC cutter cannot create a perfectly sharp internal corner, so the fillets provided enough clearance for a square piece of chalk to slide into the pocket.
Attempt 3: 3D Relief Carving a Pool Ball
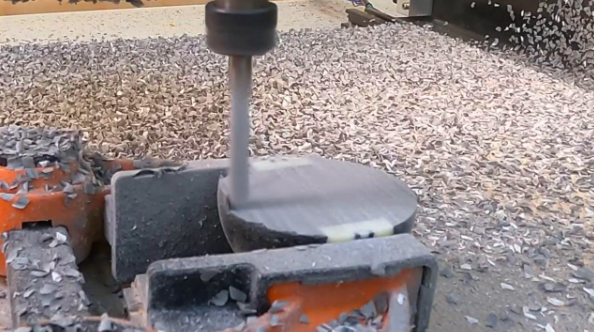
A cut pool ball reveals the interior while the CNC continues machining the exposed material.
The last test was the one I was most curious about. Engraving and pocketing were successful, but could this material hold the fine detail of a true 3D relief carving?
I started with an eight ball and planned to machine deep enough to expose a broad flat section before running the relief. The original target was about one inch deep, but the cutter started getting too close to the clamps, so I stopped short and reconsidered the setup.
During that operation I heard the cutter make a different sound. After stopping to inspect the work, I found a small piece of metal embedded inside the pool ball. I do not know whether that is typical of how these balls are made, but it was an unexpected reminder that unusual materials can contain surprises you cannot see from the outside.
The Failure: I Doubled the Depth of Cut
The most important lesson from the relief test came from a failure. An eighth-inch depth of cut had been working. I got comfortable and increased it to a quarter inch. I also slowed the feed rate and increased the RPM, but the added cutting force was too much for the workholding.
The clamp let go and the ball flew across the shop. I should have been wearing eye protection from the beginning, and I put it on before continuing. The material itself was not the limiting factor in that moment. The workholding was.
Final Relief Setup
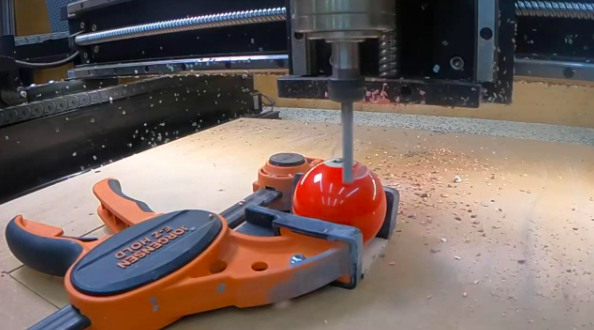
The revised setup keeps the ball captured while the CNC removes material for the relief carve.
After resetting the clamping strategy, I reran the operation with a more conservative roughing pass. Once the roughing toolpath was complete, I switched to a 10-degree tapered ball-nose with a 1/16-inch tip for the finishing pass.
The finishing toolpath used an 8% stepover and took about 45 minutes. That fine stepover gave the cutter a chance to resolve the small details without asking the material to hold large unsupported features all at once.
What I Learned About CNC Machining Pool Balls
The final answer is yes. Pool balls can absolutely be machined on a CNC router, and this test showed three very different ways to use them.
A pool ball can hold V-carved text on its curved surface without cracking apart.
Projecting a V-carving toolpath onto a 3D model lets the text follow the spherical contour.
A pool ball can be pocketed and faced deeply enough to become a functional CNC project.
Poly resin produces a lot of lightweight chips and dust, so dust control and respiratory protection matter.
Workholding is the biggest challenge because every cutting force is acting on a round object.
Pocket allowance and other CAM settings can completely change the result even when the machine setup is correct.
An eighth-inch roughing depth worked in the relief test, while jumping to a quarter inch caused the workholding to fail.
A 10-degree tapered ball-nose with a 1/16-inch tip and 8% stepover produced strong 3D detail in the final relief carve.
Pool Ball CNC Project Ideas
The most interesting part of this experiment is that it opens up a category of projects I had never seriously considered. A personalized ball could become a trophy, gift, display piece, or commemorative item. The chalk holder proved you can go beyond surface decoration and turn a ball into a functional accessory. And the 3D relief test showed that intricate artwork is possible if the workholding and toolpath are controlled.
There is a lot of room here for pool-room decor, tournament awards, personalized gifts, branded billiards accessories, and other niche products. The material itself turned out to be far more CNC-friendly than the round shape made it look.
Final Verdict: Can You CNC a Pool Ball?
Yes. The pool balls survived engraving, aggressive material removal, facing, pocketing, and a detailed 3D relief carve. The failures in the test came from a broken cutter tip, CAM setup mistakes, and workholding, not because the poly resin could not be machined.
The biggest takeaway is that the material can hold excellent detail, but the round geometry makes setup discipline critical. Keep the cutting forces reasonable, make the workholding the first priority, and do not assume a successful shallow cut means you can immediately double the depth.