Will a CNC Router Actually Cut Bone?
I have put some strange materials on a CNC router, but this one was new even for me. For this episode of Will It CNC, I ordered a bison leg bone and a few prepared bone blanks and asked a simple question: can a CNC router actually machine bone?
The goal of this series is not to pretend I already know the perfect recipe. The whole point is to experiment. I gave myself three attempts to figure out the bits, speeds and feeds, and workholding, then see whether bone could become a legitimate material for future CNC projects.
The answer surprised me. Bone can machine extremely cleanly, it can hold fine 3D detail, and even a raw irregular bone can be V-carved and cut. But the test also exposed the biggest challenge with this material: holding it safely and securely while the CNC is doing the work.
The Two Types of Bone I Tested
I started with two very different versions of the same basic material. The risky option was a raw bison leg bone that cost about $15. It was irregular, rounded, and obviously not designed to sit on a CNC wasteboard.
The safer option was a prepared bone blank. These are flat pieces of processed bone that can be purchased ready to machine. From a CNC perspective, this is a much friendlier starting point because the material has flat faces and can be held down like a small piece of wood, plastic, or other sheet stock.
My plan was to learn on the prepared blank first. If I could figure out how bone reacted to a cutter, I could take those lessons to the raw bone later in the test.
Attempt 1: Start With a Prepared Bone Blank
For the first attempt, I held the blank down using the blue tape and CA glue method. A layer of blue tape went on the wasteboard and another layer went on the back of the bone blank, then CA glue and activator connected the two surfaces.
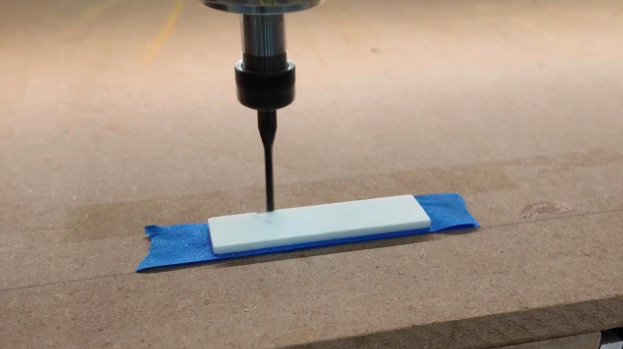
The first prepared bone blank was held with blue tape and CA glue for a shallow profile-cutting test.
I had no established bone-cutting recipe to work from, so I started conservatively with a small downcut bit and a shallow depth of cut.
My starting recipe was:
Bit: 1/8-inch downcut bit
Feed rate: 40 inches per minute
Spindle speed: 18,000 RPM
Depth of cut: 0.03 inch per pass
Toolpath: slow ramp into the material
These settings are starting points only. Your CNC, cutter, workholding, and specific bone material may require different settings.
The First Bit Broke
The first attempt did not last long. The 1/8-inch downcut bit broke. I had a lot of cutter sticking out because the bit had a 1/4-inch shank transitioning down to the smaller cutting diameter, and the combination of that setup and the first recipe was not happy.
That failure answered one question immediately. I needed to slow the process down. Rather than abandon the test, I treated the next cut like attempt 1A and changed the recipe.
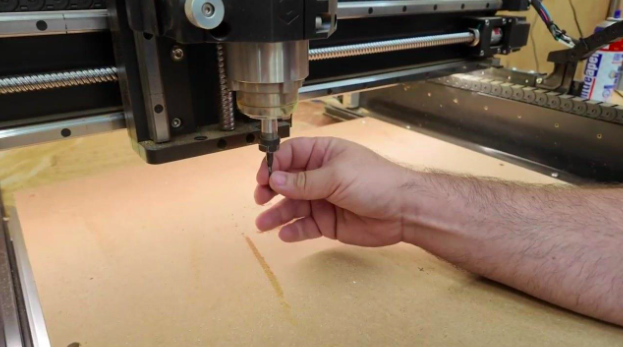
The first 1/8-inch downcut bit broke, forcing a slower second recipe for the prepared bone blank.
Attempt 1A: Slow It Down and Switch to an Upcut Bit
The second cutter choice was not the result of some master plan. I switched to a 1/8-inch upcut bit because that was what I had after breaking the downcut bit. The important change was the speed of the cut and the shallower pass depth.
The revised recipe was:
Bit: 1/8-inch upcut bit
Feed rate: 20 inches per minute
Spindle speed: 18,000 RPM
Depth of cut: 0.02 inch per pass
These settings are starting points only. Your CNC, cutter, workholding, and specific bone material may require different settings.
This time it worked. The cut was clean, the shape stayed intact, and the material did not chip apart around the edges. I ended up carving a bone shape out of bone, which is objectively ridiculous, but it proved something useful: prepared bone blanks are absolutely machinable on a CNC router.
Attempt 2: Can Bone Hold a 3D Relief?
A simple profile is one thing. I wanted to know whether bone could hold enough detail to make a real 3D project worthwhile. For the second major attempt, I kept using the prepared bone material and loaded a tapered ball nose bit for a 3D relief carve.
I had never 3D relief carved bone before, so this was another experiment rather than a proven workflow. The carve took about an hour.
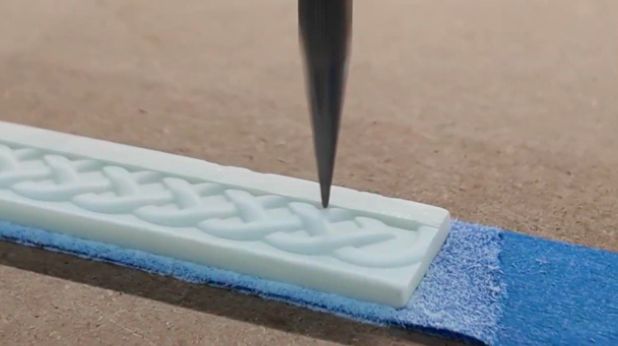
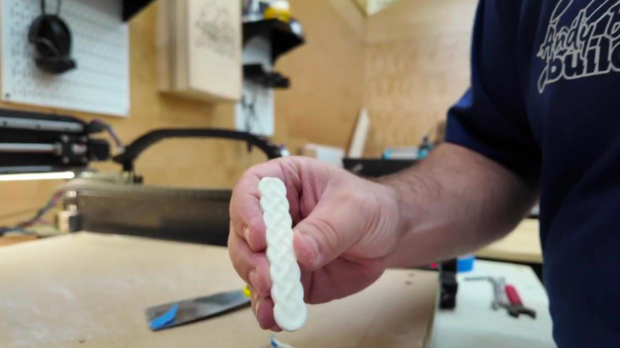
The finished result was one of the biggest surprises of the entire test. The relief held its shape and detail far better than I expected. The surface looked clean enough that I immediately started thinking about small decorative projects instead of treating this as nothing more than a novelty material.
Attempt 3: Put the Raw Bison Bone on the CNC
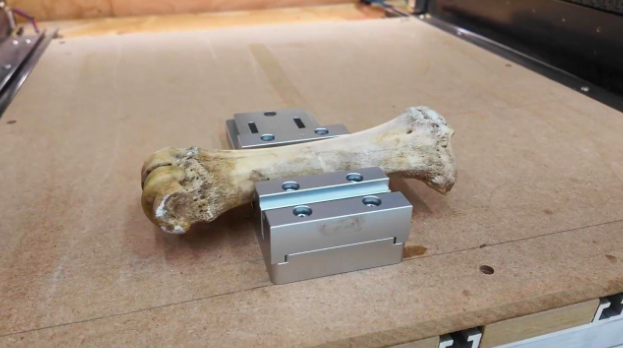
A vise provided the first workholding strategy for the irregular raw bison bone.
Once the prepared blanks proved that bone itself could be machined, it was time for the hard version of the test: the full raw bison bone.
The first problem was obvious before the spindle ever turned on. There is almost nothing flat about a leg bone. Double-sided tape and the blue tape and CA glue method were not realistic options, so I put the bone in a vise that was screwed to the wasteboard.
I planned two tests on the raw bone. First, I wanted to see whether the outside surface could be V-carved. Second, I wanted to make repeated passes through one end of the bone to see whether a router bit could actually cut all the way through it.
V-Carving Worked, but the Workholding Did Not
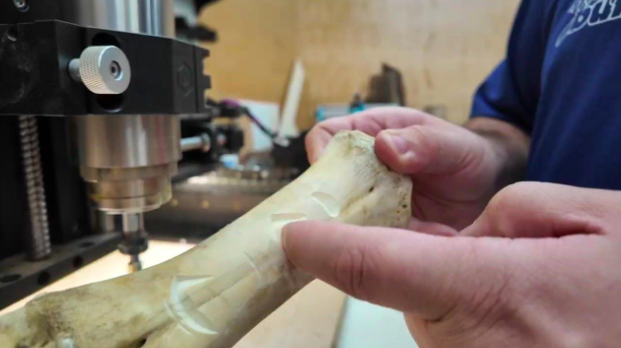
The raw bone V-carved cleanly, but the vise began to loosen as the irregular surface shifted under cutting forces.
The V-carving itself went extremely well. The surface carved cleanly and proved that the curved exterior of the bone could hold an engraved design.
The vise was the weak link. As the cutter reached one side and applied pressure, the opposite side of the bone wanted to lift. The setup came loose enough that I stopped the machine, and I could remove the bone from the vise by hand afterward.
That was enough for the V-carve test. I did not need to keep pushing a workholding setup that had already shown me it could move.
A Better Workholding Setup for Cutting Through the Bone
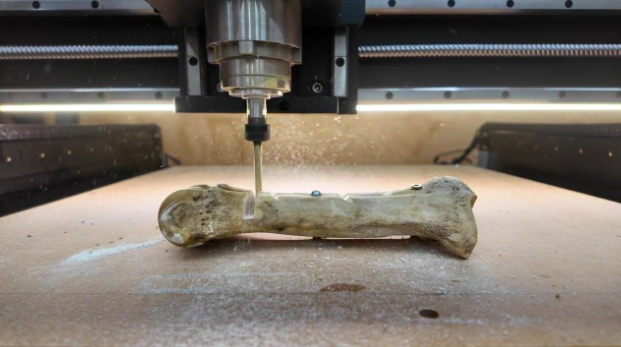
The roughing bit made repeated passes across the end of the bison bone until it cut through.
For the cut-through test, I changed strategies completely. I made a quick wooden wedge to support the twist in the bone and used screws to fasten the bone directly to the wasteboard. It was not elegant, but it provided support where the bone needed it and left the end exposed for machining.
For the cutter, I used the Beast roughing bit from IDC. My reasoning was simple: it is a sharp three-flute roughing bit, and this was definitely a roughing operation.
The CNC made repeated passes across the end of the bone until it cut through. The workholding held, the bit held, and the bone itself cut surprisingly cleanly.
One Important Safety Lesson
There was one moment that matters more than the cool result. When the final piece separated, the offcut became a flying projectile. Earlier in the test, the vise setup had also come loose.
That is a good reminder that unusual materials create unusual workholding problems. The cutter may be perfectly capable of machining the material, but that does not make an unstable setup safe. Secure the material first, keep clear of the cutting area, and use appropriate eye protection and machine safety practices.
So, Will a CNC Router Cut Bone?
Yes. The answer is clearly yes.
Prepared bone blanks were the easiest and most practical version of the material. Once I slowed the cut down, the blank machined cleanly with a small end mill, and it handled a detailed 3D relief surprisingly well. That makes prepared bone a legitimate material option for smaller CNC projects.
The raw bison bone was more complicated, but not because the bone was impossible to cut. We successfully V-carved the outside and cut through the end. The real problem was the shape and the workholding required to keep that shape secure.
What Could You Make From Bone on a CNC?
The prepared blanks are where I see the most immediately useful project possibilities. Based on what this test proved, small pieces can be profiled and 3D carved cleanly.
A few ideas that came out of the test:
Pendants and necklaces
Small jewelry components
Decorative relief carvings
Small knickknacks and keepsakes
Engraved or V-carved bone art
The raw bone opens up a different category of projects. Bone art is already a real thing, and being able to add CNC-carved graphics or accurately machine sections of the material creates some interesting possibilities. The workholding problem just has to be solved for the specific shape in front of you.
Key Takeaways From the Bone Test
Prepared bone blanks are much easier to hold and machine than raw irregular bones.
The first 1/8-inch downcut attempt at 40 IPM and 0.03-inch depth of cut broke the bit.
A slower 20 IPM feed rate with a 1/8-inch upcut bit and 0.02-inch depth of cut produced a clean profile cut.
Prepared bone held enough detail for a successful tapered-ball-nose 3D relief carve.
The raw bison bone V-carved cleanly.
A vise alone was not reliable enough for the irregular bone once cutting forces began to lift one side.
A support wedge and screws held the bone better for the cut-through operation.
The roughing bit cut through the bone cleanly, but the separated offcut became a projectile.
With odd materials, workholding can be a bigger challenge than the machining itself.
Watch More Will It CNC Tests
This bone experiment is one episode in the Will It CNC series, where I put unusual materials on a CNC router to find out what actually works. If you want to see what other strange materials I’ve tried, check out our playlist here.