Nobody Expected a CNC Router to Do This to a Toilet Seat
I have machined a lot of normal materials on a CNC router, but this one was different. For this episode of Will It CNC, I bought a $15 enameled-wood toilet seat and asked a simple question: can you actually CNC it?
The goal was not to make the perfect custom toilet seat on the first try. The goal was to learn. I gave myself three attempts to figure out the workholding, zeroing, bits, speeds and feeds, and what this material actually looks like once a cutter gets through the white enamel coating.
By the end, I was genuinely surprised. This stuff machined cleaner than I expected, held tiny details, and opened up some ridiculous but completely usable project ideas.
What Is an Enameled-Wood Toilet Seat?
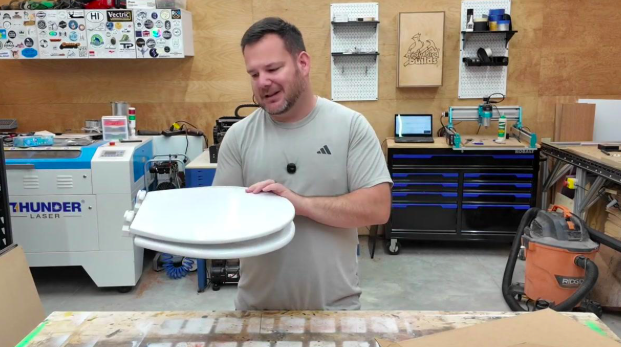
The test piece was an inexpensive enameled-wood toilet seat, not a solid plastic seat.
The seat I tested was a Bemis 500 series seat labeled as enameled wood. I knew there was wood underneath the white surface, but I did not know exactly what I was going to find once the CNC started cutting.
That was the whole point of the test. Plastic toilet seats are one thing. This one had a wood-based core with a hard white coating, so I wanted to see whether the coating would chip, crack, peel, or machine cleanly with the right cutter.
Step 1: Strip Off the Hardware and Figure Out Workholding
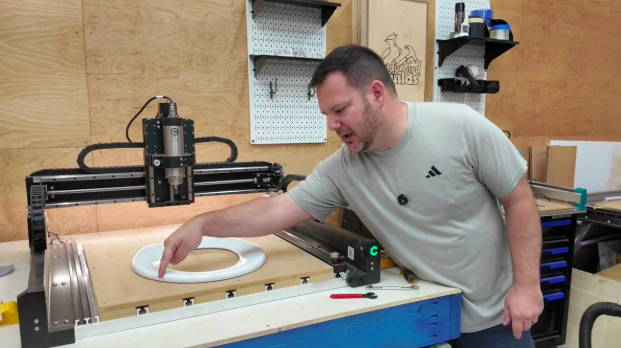
Removing the hardware and flattening the setup made the odd-shaped seat much easier to hold on the CNC bed.
The first challenge had nothing to do with the cutter. It was workholding. Toilet seats are odd shapes, they have hardware on the back, and they do not give you the nice square reference edges you get from a normal board.
I removed the hinges and the small bumpers so the seat could sit flatter on the CNC bed. My first choice was double-sided tape. I normally prefer screws, but screws were not practical here and I wanted the top surface completely clear.
Later, when I moved to the lid, the curved shape made tape less useful. For that operation I switched to clamps and kept them on the outside edge where I believed the toolpath would stay clear.
Step 2: Zero From the Center Instead of the Lower Left
My normal workflow often uses the lower-left corner for XY zero, but that does not work very well when the material is basically a big curved ring. There is no clean lower-left reference point.
For this project, I measured to find the center and set XY zero there. Z zero was trickier because the seat is not perfectly flat. I picked the area where the text was going to be carved and zeroed around the middle of that curved surface.
This is one of those situations where you have to accept that the object itself is part of the challenge. The CNC can be perfectly accurate and you can still get uneven depth if the surface rises and falls underneath the cutter.
Attempt 1: Pocketing Text With a Downcut Bit
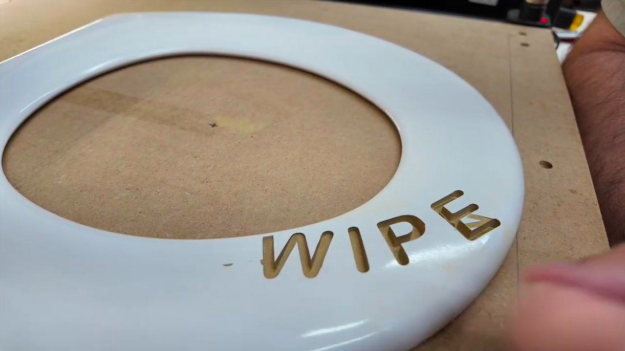
Attempt one proved the material could machine cleanly, even though the original text layout did not follow the seat shape correctly.
For the first cut, I used a 1/8-inch downcut bit on a 1/4-inch shank and pocketed text into the seat. The full pocket depth was 1/4 inch.
The biggest surprise was how cleanly the material machined. The white coating did not explode or peel away. The downcut geometry pushed the material downward and left a crisp edge around the pocket.
The problem was alignment. I had designed the file around the published dimensions of the toilet seat, but the actual shape did not match the drawing closely enough. The machining worked. The layout did not. That is exactly why I gave myself three attempts.
The Cutting Recipe That Worked
For the first pocketing test, I stayed conservative:
Bit: 1/8-inch downcut bit
Spindle speed: 18,000 RPM
Feed rate: 60 inches per minute
Depth of cut: 1/16 inch per pass
Full depth: 1/4 inch
These settings are starting points only. Your CNC, cutter, workholding, and specific toilet seat may require different settings.
Attempt 2: V-Carving the Toilet Lid
Once I had proof that the core and coating could be machined, I wanted to push the test further. Pocketing letters is one thing. A detailed V-carve would tell me a lot more about how well the coating can hold tiny islands and fine lines.
For the lid, I used a 60-degree down-shear V-bit. This is not a typical straight-edged V-bit. The cutting action pushes the material downward, just like the downcut end mill from the first test. My hope was that it would keep the enamel and wood fibers supported instead of lifting them and causing blowout.
Because the lid had a little rise and fall across the surface, I used clamps instead of relying on double-sided tape. Workholding odd objects like this is really half of the experiment.
The Detail Was Better Than I Expected
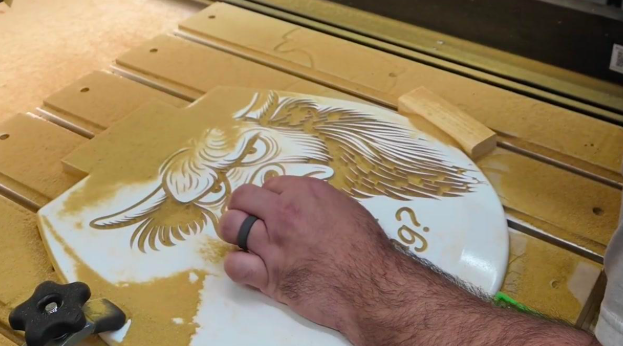
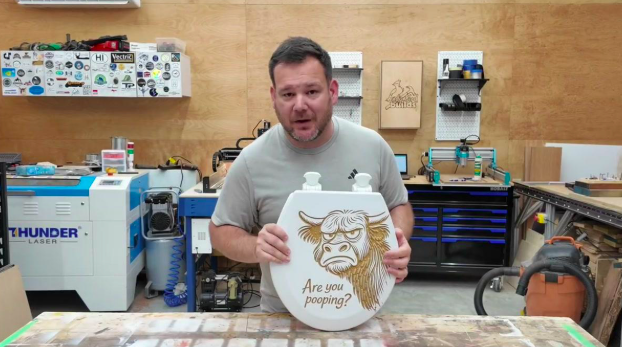
The down-shear V-bit preserved surprisingly small details and created strong contrast against the white enamel.
This was the point where the project got really interesting. The V-carved graphic held tiny details that I expected to lose. Small dots and little islands stayed intact, and there was virtually no blowout around the design.
The white coating also created instant contrast against the exposed brown core. There was no paint-fill step required just to make the graphic readable. The machining itself created the contrast.
And one more win: the cutter cleared the clamps. On an odd-shaped setup like this, that counts.
Attempt 3: Fix the Alignment and Try the Seat Again
For the third attempt, I went back to the seat and fixed the layout. I recentered the design so the words followed the contour better and used more double-sided tape for the workholding.
Z zero was still a judgment call because the seat surface is curved. I split the difference and set zero near the middle of the height variation instead of trying to force a flat-board workflow onto a curved object.
The second pass at the seat was much better. The alignment followed the shape more naturally, and the material still machined cleanly. At that point, the answer to the original question was pretty obvious.
So, Will a Toilet Seat CNC?
Yes. At least this enameled-wood toilet seat will, and it machines shockingly well.
The closest comparison from this test is MDF. The core cut cleanly, the top coating stayed crisp, and conservative settings produced very usable results. The coating may actually help preserve visual detail because it gives the carved areas such a sharp contrast.
The biggest challenge was not the material. It was dealing with the shape. Workholding, finding a usable zero point, and compensating for curved surfaces were much harder than getting the cutter through the seat.
What I Would Change Before Actually Using One
There is one obvious issue if you want to put a machined toilet seat in a real bathroom. Once you carve through the enamel, you expose the wood-based core. I would not leave those pockets open and unfinished.
An epoxy fill is the most likely next step I would test. The goal would be to fill the carved areas and get back to a smooth, sealed surface. I did not test that in this video, so I would treat it as the next experiment rather than a finished recipe.
What Could You Actually Make With This?
A custom bathroom seat is the obvious answer, but I think the funnier idea is a trophy. Fantasy football leagues already love last-place punishment trophies. Put the loser’s name and the year on a machined toilet seat, hang it on the wall, and you have a trophy nobody wants to win.
That is what I like about the Will It CNC series. The point is not that everybody suddenly needs to start machining toilet seats. The point is to learn what materials can do, find the limits, and give yourself more options when a weird project idea shows up.
Key Takeaways From the Test
Remove the hinges and bumpers so the part can sit as flat as possible.
Use center XY zero when the object does not give you reliable square reference edges.
Expect Z zero to be a compromise on curved surfaces.
A downcut end mill produced very clean pocket edges in the enamel and wood core.
A down-shear V-bit preserved small details with very little blowout.
Double-sided tape worked for the seat, while clamps were more practical for the curved lid.
Published dimensions may not match the exact contour well enough for a design that follows the seat shape.
If the finished piece will be used in a bathroom, the exposed carved material needs a sealed, smooth finishing solution.
Watch More Will It CNC Tests
This toilet seat is just one of the unusual materials I have put on a CNC router. Watch the rest of the playlist here.