Desert ironwood is dense, heavy, oily, expensive, and much harder than the woods I normally cut. That made it a perfect candidate for Will It CNC.
The goal was not just to prove that a router bit could scratch it. I wanted to find a repeatable recipe for cutting, pocketing, V-carving, and 3D relief carving the material, then use what I learned to make a finished project from a $90 piece of wood.
The Big Question: Will Desert Ironwood CNC?
For this test, I chose desert ironwood because it was the hardest readily available wood I could find for sale in the U.S. It is dramatically denser than black walnut, and the piece I used for the final project felt more like a block than a normal board.
The first concern was workholding. Ironwood is oily, so I was not sure double-sided tape would stay attached. The second concern was heat and bit wear. Harder wood puts more load on the cutter, and that can turn a conservative toolpath into a burned bit or scorched project quickly.
So I started slow and treated the first few cuts as tests instead of trying to jump directly into the final project.
Attempt 1: Establishing a Safe Baseline
The first test used a basic 1/4-inch two-flute upcut bit. I wanted to see whether the material would produce chips, whether the cutter sounded overloaded, and whether the tape would hold.
Starting setup
Bit: 1/4-inch two-flute upcut bit
Feed rate: 50 inches per minute
Plunge rate: 25 inches per minute
Spindle speed: 18,000 RPM
Depth of cut: 1/16 inch
Workholding: double-sided tape
Starting points only: these are the settings used in this specific test on this specific machine, bit, and piece of material. They are not universal feeds and speeds.
The first cut was encouraging. Even at a conservative feed rate, the cutter was making real chips instead of turning the material into fine dust. The top edge showed some tearout, which was expected from an upcut bit, but the cut itself was clean enough to keep going.
Pocketing the Ironwood
The next step was a deeper pocket using the same general recipe, but I increased the depth of cut to 0.125 inch. Because the cutter had to enter a much denser material, I added a ramp instead of plunging straight down.
That ramp mattered. You could hear the bit load up as it entered the wood, but once the cutter was moving laterally it handled the material well. The pocket produced solid, well-formed chips, which was a good sign that the cutter was actually cutting rather than rubbing.
The pocket did show machining ridges at a 40% stepover. That was not a failure, but it told me surface finish would need more attention when we moved into the 3D work.
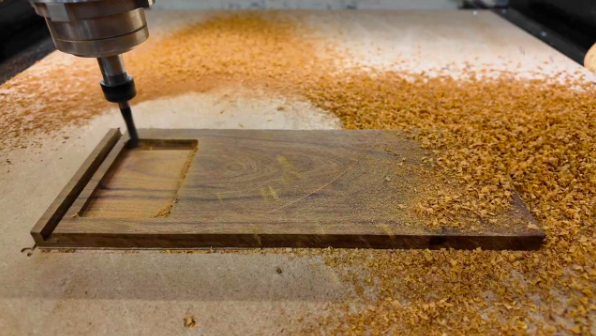
The upcut bit pocketing the ironwood after ramping gradually into the dense material.
Attempt 2: V-Carving Desert Ironwood
The upcut test gave me a baseline, but V-carving is a completely different operation. A V-bit has a straight cutting edge instead of the helical cutting action of an end mill, so I started with a separate, conservative recipe.
V-carve starting setup
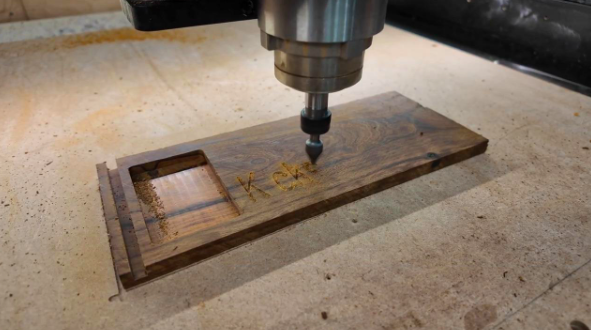
The 60-degree V-bit carving lettering into desert ironwood during the first V-carve test.
Bit: 60-degree V-bit
Feed rate: 40 inches per minute
Plunge rate: 20 inches per minute
Spindle speed: 14,000 RPM
Maximum programmed depth: 0.125 inch
Actual V-carve depth: approximately 0.1 inch
The material held detail extremely well. That part did not surprise me. Dense woods usually give a V-bit more material to support the fine edges around letters.
What did surprise me was the cleanup. The cut material packed into the V-grooves almost like concrete. Even after vacuuming, a lot of debris stayed stuck in the corners. I normally run V-carves twice because a second pass saves sanding time, and that helped here, but the result still was not as clean as I wanted.
My takeaway from this test was that desert ironwood can be V-carved, but this was the operation that needed the most dialing in. Lower RPM, better dust extraction, or a different cutter geometry could all be worth testing.
Attempt 3: 3D Relief Carving
Next I switched to a 1/4-inch ball-nose bit to see how the wood handled a 3D relief. This is where the density of the material started to become an advantage. The internal grain and color changes looked incredible as the cutter exposed different depths.
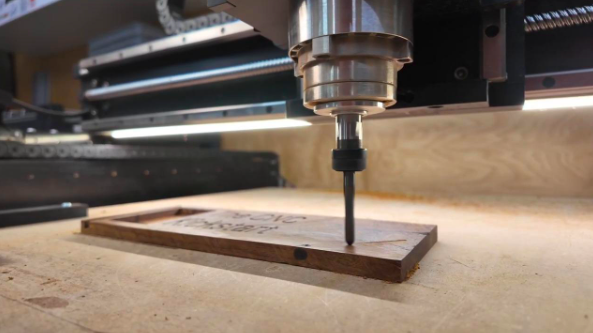
A 1/4-inch ball-nose cutting the test relief while the changing grain pattern appears below the tool.
Relief test setup
Bit: 1/4-inch ball-nose
Feed rate: 50 inches per minute
Plunge rate: 25 inches per minute
Spindle speed: 18,000 RPM
Stepover: 8%
The relief was successful, but an 8% stepover still left enough machine lines that I knew I could improve the final surface. The workholding also came very close to giving up. The oily wood had not completely defeated the tape, but it was obvious I was asking a lot from it.
That gave me two changes for the final project: use a tighter finishing stepover, and pay very close attention to workholding before committing an expensive blank.
The Final Test: A $90 3D Ironwood Tray
With the individual operations tested, I moved to the only large blank I had. It was about 10 inches by 4 inches by 1 1/2 inches and cost roughly $90. There was no backup piece, so this was where the earlier testing actually mattered.
The project was a 3D sunken tray with V-carved gravity lines, adapted from a free Vectric project originally created by Dave Hepson. I resized the design to fit my stock and planned three cutting stages: roughing with an upcut bit, finishing with a ball-nose, and the decorative V-bit toolpath.
Stage 1: Roughing
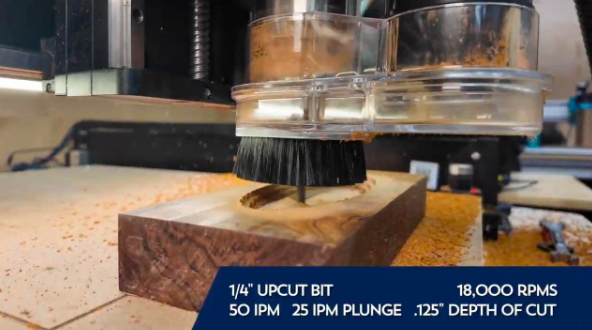
The 1/4-inch upcut bit roughing the sunken tray into the $90 desert ironwood blank.
The roughing pass used the same 1/4-inch upcut recipe that had already worked in the pocketing test. There was no reason to get aggressive on a one-of-one blank.
Bit: 1/4-inch upcut
Feed rate: 50 inches per minute
Plunge rate: 25 inches per minute
Spindle speed: 18,000 RPM
Depth of cut: 0.125 inch
Stage 2: 3D Finishing
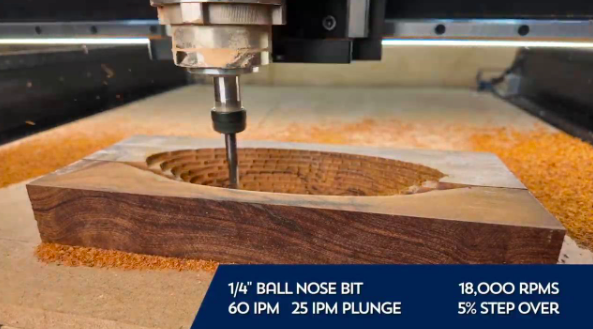
The ball-nose beginning the 3D finishing pass at a tighter 5% stepover.
For the finishing pass I tightened the stepover from 8% in the test piece to 5%. I initially set the feed at 60 inches per minute, then increased it as the cut progressed because the smaller stepover meant the cutter was removing very little material on each pass.
During the run I increased the feed rate as high as 90 inches per minute. The change worked well, and the finishing pass took roughly 35 minutes instead of the hour I initially expected.
The surface still had a few light machine lines that would need finish sanding, but the difference between the 8% test and the 5% final stepover was obvious. The tighter stepover produced a much smoother surface.
Stage 3: V-Carved Gravity Lines
The final machining step brought back the 60-degree V-bit. Based on the earlier test, this was the part I trusted the least. The design also used a fluting toolpath, which was a first for me, and the V-bit had to work across a curved 3D surface.
I used the same conservative 40 inches per minute, 20 inches per minute plunge, and 14,000 RPM starting recipe, then ran the V-carve again to clean up the packed fibers and debris.
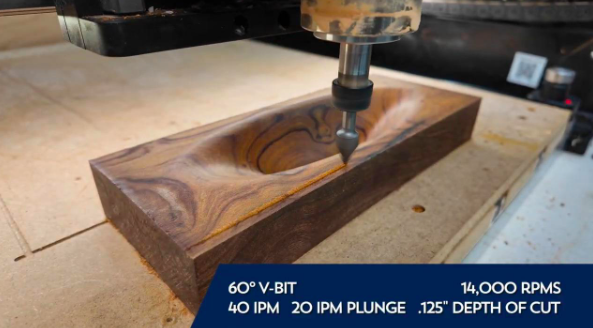
The 60-degree V-bit carving the decorative gravity lines across the 3D tray surface.
What I Learned About CNC Machining Desert Ironwood
After a couple hours of testing and machining, the answer is yes. A desktop CNC can machine desert ironwood successfully with normal carbide router bits, but the material rewards conservative setup and punishes shortcuts.
Ramp into deeper cuts. The dense material loads the tool hard when it first enters, so a gradual entry is much friendlier than a straight plunge.
Look for chips, not dust. The successful upcut settings produced solid chips even at conservative feed rates.
Expect faster tool wear. None of the bits were ruined, but the ball-nose showed some heat discoloration after the longer run.
Workholding deserves extra attention. The wood is oily, and double-sided tape came close to letting go during the relief test.
V-carving was the weakest operation. The material held detail, but debris packed tightly into the grooves and required repeat passes and extra cleanup.
Stepover matters. Moving from 8% to 5% on the ball-nose finishing path noticeably improved the surface finish.
The helical cutters handled the material better than the straight-edged V-bit. The upcut and ball-nose cuts were more predictable and cleaner.
Did the Bits Survive?
Yes. The coated upcut bit showed pitch buildup but no obvious damage. The 1/4-inch ball-nose had the most visible signs of heat because it ran the longest, but the cutting edge was still sharp. The V-bit also showed some discoloration and pitch buildup, but none of the three cutters broke or became unusable during the test.
That does not mean hard woods are free to machine. A dense material is still going to shorten tool life compared with softer species. The important point is that a normal desktop CNC and normal router bits handled the job without burning up.
Final Verdict: Can You CNC Desert Ironwood?
Yes. Desert ironwood can be cut, pocketed, 3D carved, and V-carved on a desktop CNC router. The 3D work was actually the highlight because the toolpaths exposed grain and color that you would never see on the flat surface of the board.
The final tray came off the machine with no applied finish and almost no sanding. Because the wood naturally feels oily, the raw surface already had a rich look. A little finish sanding was all it needed.
The bigger takeaway is not that everyone needs to buy desert ironwood. It is that a desktop CNC is capable of more than we sometimes give it credit for. Hard, expensive material does not automatically mean you need industrial machinery. It means you need the right cutter, conservative starting settings, solid workholding, and a willingness to test before committing the final blank.
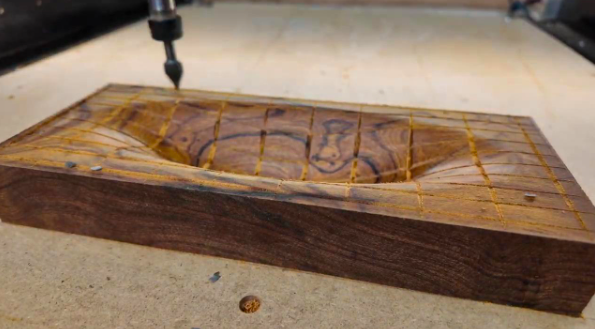
The finished sunken tray straight off the CNC, showing the grain revealed by the 3D carving and V-bit detail.