Read This BEFORE Buying Wood For Your Next CNC Project (4 Easy Steps)
This one choice when buying wood can ruin your CNC projects, even if your file is perfect. That one choice is buying wood that is dry and suitable for the project that you are making. I'm going to give you a simple four-step system using three of the most common projects, the best wood for each, and the quick checks to make sure you don't bring home junk wood. Let's go!
Step #1
Step number one is to figure out what category your project fits in. I've got this broken down into three categories. There are outliers, but most every CNC project fits into one of these three categories. So, before we think about specifics, let's think about the broader categories. And we'll get into specifics here in a minute.
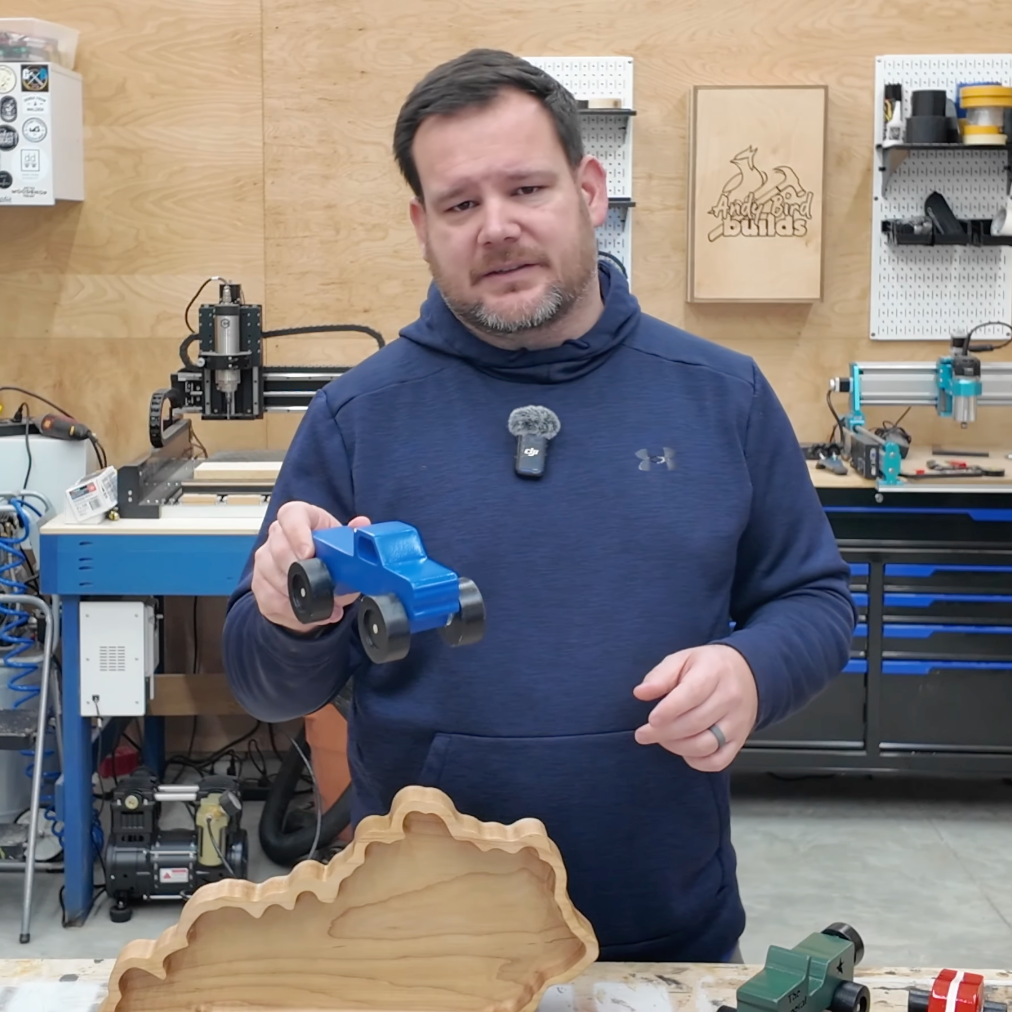
The first category are projects that are going to be painted or stained. All stained, painted projects fall into this category. And the example that I'm using for this are these wooden toy cars. So you'll see me break down this specific project as we go through the different steps.
Category number two is projects that you want a natural wood look. You want to see the wood grain. So, for this example, I'm going to be using this Kentucky tray made out of maple. And you can see the grain clearly in something like this, and it's a design feature of of the end product.
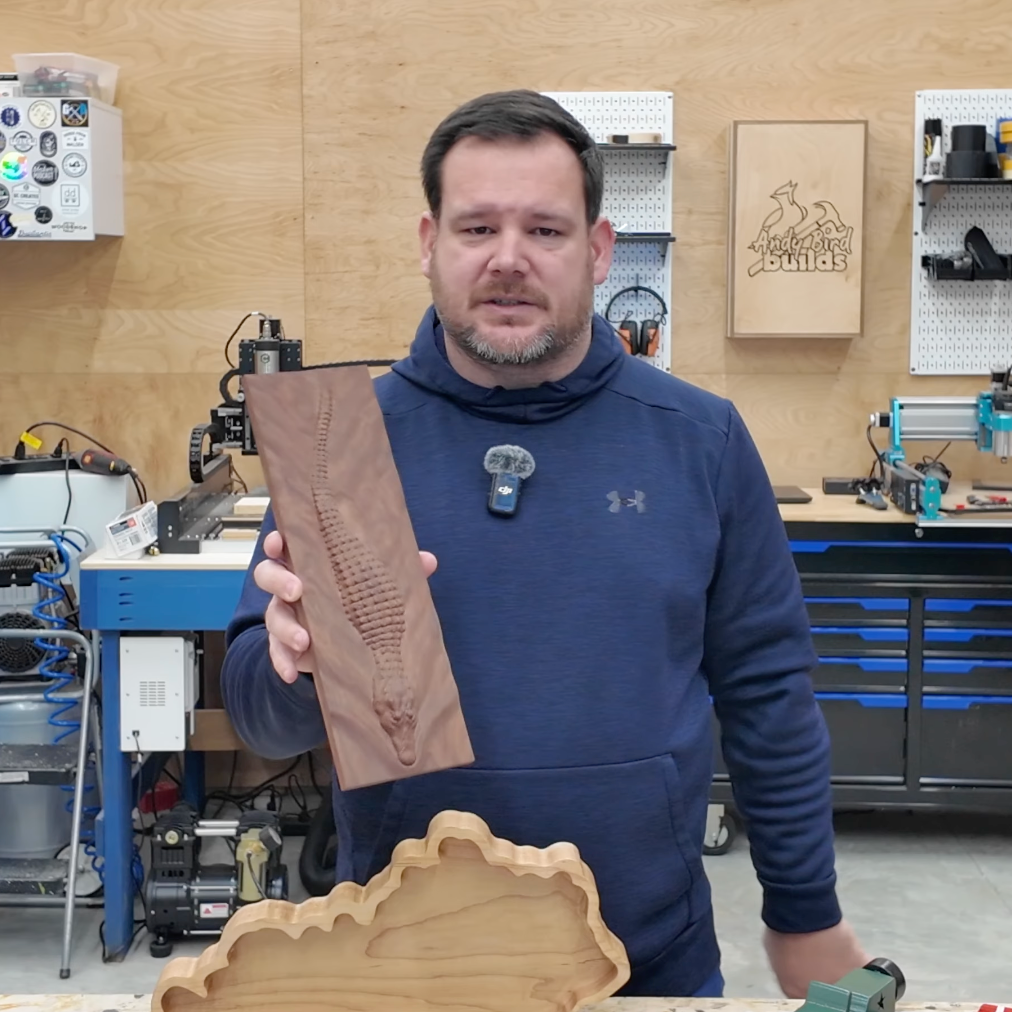
Category number three are 3D relief projects. Now, for 3D relief projects, we want a wood that holds detail and doesn't blow out or chip out. You can see the fine deal detail on this crocodile. And this is the example that we're going to be using throughout the four steps.
Step #2
Step number two is to choose the right wood for your specific project. So first we're going to look at painted or stained. Some examples are name signs, wall decor, kids projects, or some craft fair items. So best choices are MDF which is great to be painted does not stain well, asterric on that. Then pine which can be painted or stained and plywood can be painted or stained as well. These are less expensive materials. They machine consistently and of course they take paint or stain well. One thing to avoid is cheap construction plywood.
So, an example project I have for this category, like I said before, are these toy vehicles. I made three of them in a video before, for my kids. These are kids push toys. So, when I was going through the process of making these from the very beginning, thinking what was I going to make them out of? I decided to make them out of pine. And why? Because of these reasons right here. I needed a cheap material because I knew I was going to paint it. I could have made these out of a hardwood and they would had a different look, but I wanted them to be bright colors, easy to paint, easy to machine, easy to source locally. And so that's why I went with pine for something like this. I thought about its intended use, how I wanted it to look, and that's what we came up with.

So category number two is natural wood grain, where we want the wood grain to be visible. Some examples of this are VCarve signs, serving boards, and home decor. Some best choices for it really depends on the area that you live and what's accessible, but maple, cherry, walnut, and poplar are popular here in Kentucky for budget builds and actually can be painted as well. It's cheaper, but it offers some strength as well. So, these woods look high-end. They carve well, clean VCarves and clean pockets, and they take finish really well, and they they look fantastic with that finish on them. The grain really pops. Something to avoid is boards with knots. Unless we make them a design feature or pith. Pith is the center of the tree. It is the most unstable. It cracks and blows out really easily.
The project we're using for this category is this Kentucky catchalls tray or serving tray. I've used these and sold these as nut trays, candy trays. But some people just like to set them on their mantle or shelf as well. But the feature here is the grain looks great. It's a feature of the product. It makes it look higher-end rather than a pine or a plywood would completely change the feel of this project. Now, the other thing is I wanted to put a food safe finish on this one in particular, and so a hardwood takes the food grade finish fantastic. Just mineral oil.
So, the last category are 3D relief carves. Some other examples other than those 3D relief carves are layered projects and inlays. The best choices for wood around these projects are tight grained hardwoods like hard maple, walnut, and mahogany. These hardwoods have uniform density. Not just a tight density, but they're uniform. That creates minimal tear out and enables them to hold fine detail. Again, you want to avoid open grain woods like oak or ash. Even though they're a hardwood, they still have a wide grain and tear out is possible.
Our example for this category is this 3D relief carve of a crocodile. And you can see the fine grain that we wanted it to hold. All the knobs on this back, the detail on its face. This is made out of mahogany and so it has a tight grain structure. Not a lot of sanding. If I was to make this out of a pine, I would have a couple hours of sanding fuzziness and things would chip out and it wouldn't hold nearly as much detail.
Step #3

So, now that we know what we need to buy for our specific projects, that leads us to step number three. Buy from the right place. So, where do we get wood for painted and stained projects? Well, for my project example, uh we got this wood from Lowe's. The reason for that was it's a couple miles down the street. It's easy accessible. It's relatively cheap. So it was really a no-brainer for this.
But what about some other ones? What about if I'm making a project out of MDF or plywood? Where do I get those sheet goods? Well, I would go to the same place. I get MDF from Lowe's, Home Depot, or Menards. If you're in the US, any of those home stores typically have a varying selection. It's different across the country, available plywoods and MDFs.
Where do we get natural wood grain? Where do we get hardwoods from? Now, this one is going to vary different, and I've spent a ton of time trying to boil this down into some usable information across all regions of the world and country because different woods are available in different regions.
So, the first place I would recommend is looking up a hardwood dealer, something that's easy, they do have locations across the country, is Rockler and Woodcraft. If you're just starting out, this is a more expensive option, but you're buying confidence. Another option is what we did for the wood on this Kentucky tray. We found a local sawmill. I have a local sawmill that I have a relationship with, and that's where the maple for this project came from.
And next, where do we get wood for 3D relief carves? Well, this is going to be very similar to the place as natural wood grain. Another option, I got this wood from is a local wood reseller. Now, this is a wild one. He buys cabinets from cabinet shops, things they're going to throw away for super cheap and resells them. So, I buy hardwood cut offs 16 and 18 inches long all the time. And that's where this mahogany came from.
Pro Tips
All right, I've got some pro tips for you that I've learned from over the years of sourcing wood. The number one is make friends with other local woodworkers. Look around your area and ask people, say, "Hey, do you mind sharing where you get your wood from?" Or, "Hey, do you have any leftovers that I can buy from you? Any cut offs that I can buy from you to get started for cheap?" Help each other out. do the same thing for someone else and share information. It is huge!
Another thing is buying wood online. I don't recommend this as your first option just because of shipping cost and wood movement. We'll talk about moisture content and stuff like that. And so that's another option for hardwood is buying it online.
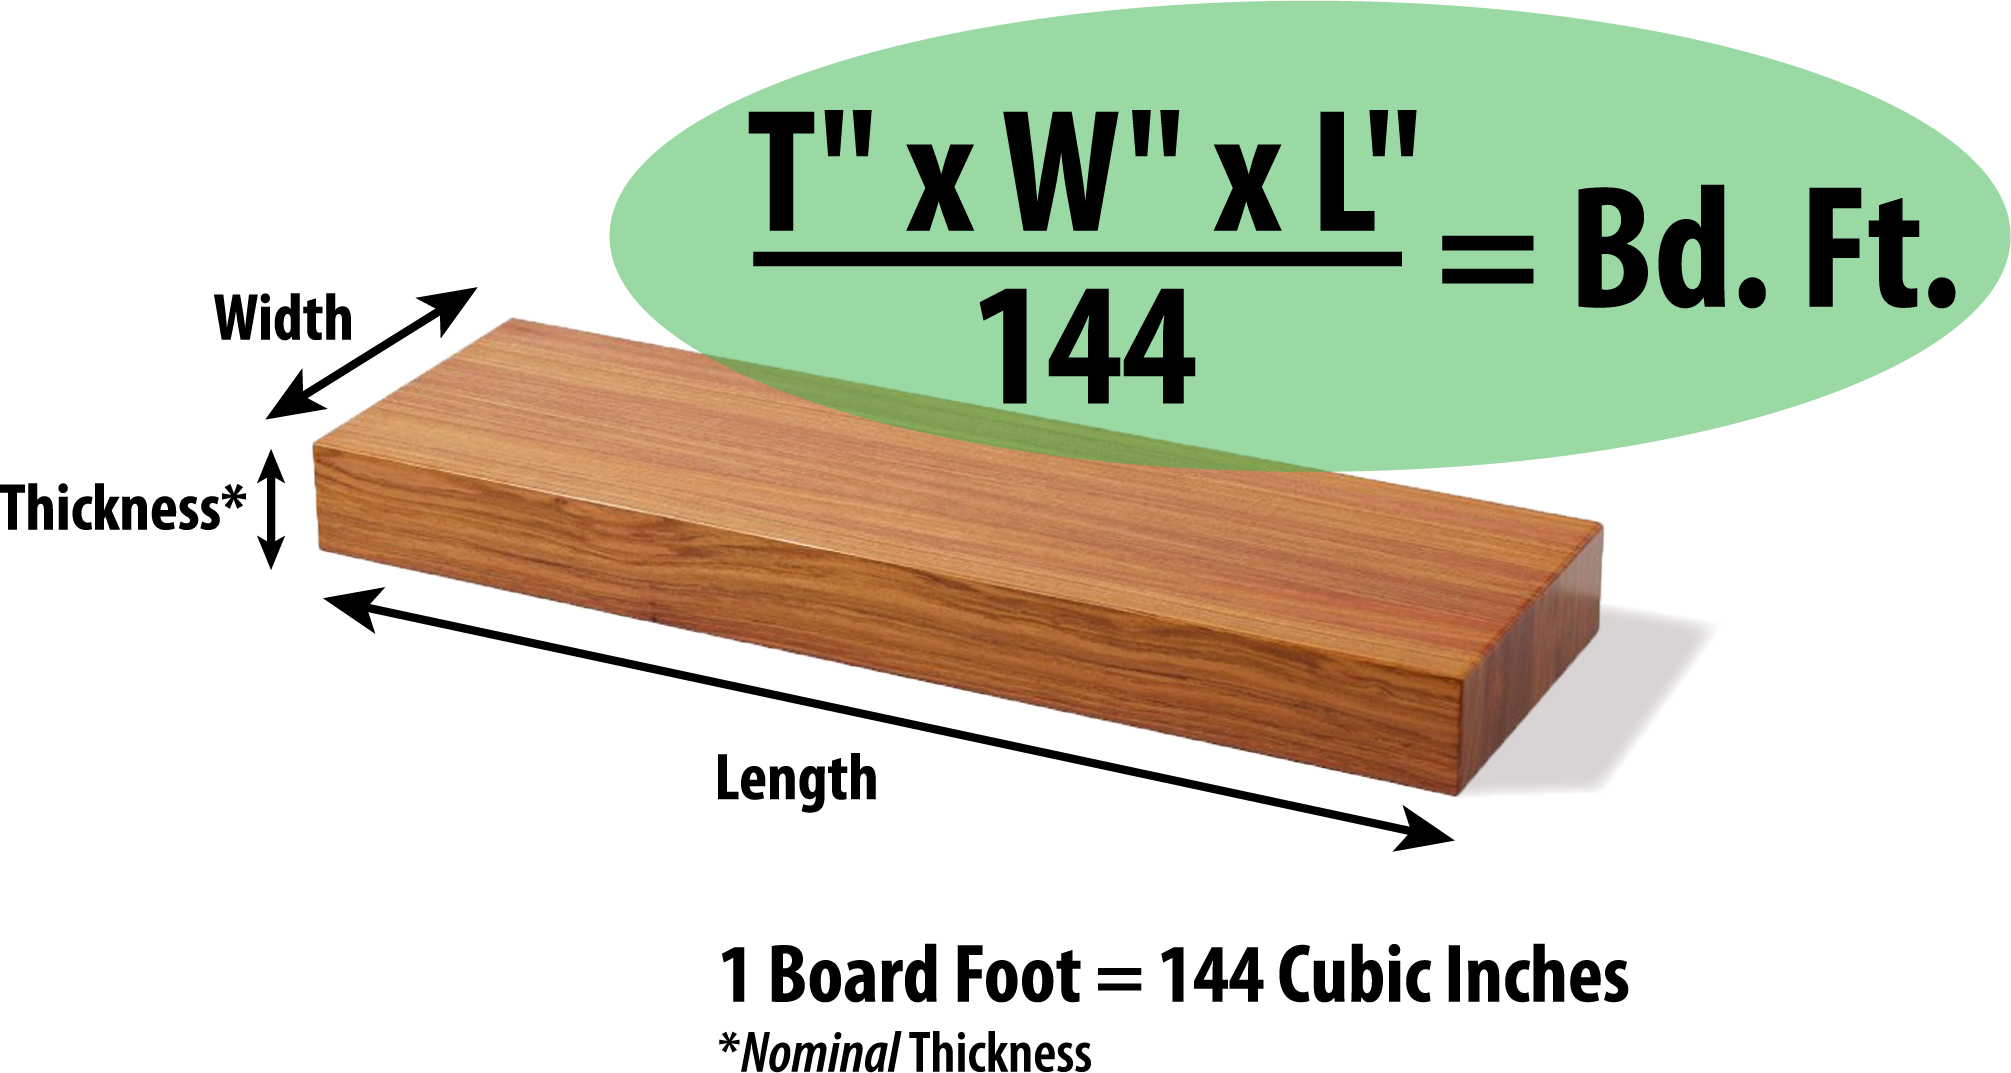
Something else that'll be really helpful is knowing the lingo. How do I order hardwoods? How do I order plywoods? Do I order it like I order a 2x4? So, in the hardwood lumber industry, you're going to hear a lot the the terms of “board feet” or “board foot”, which is basically a volume measurement. The other thing that you'll hear a lot is talking in quarters. You'll hear four quarter or you'll hear six quarter or eight quarter. And so four quarter is an inch thick board. Six quarter is an inch and a half.
And the last tip I've got for you is before you cut any hardwood on your CNC, do a practice piece of something cheaper. Even if it is a cut off or something that you're just going to throw away. There's nothing worse than spending good money on a piece of hardwood, thinking your file is right. You hit go and it ruins the board and you have to go buy another one. So, another thing you can do is an air pass. You can set your Z height an inch above your workpiece and make sure your file is going to do what you think it's going to do. That's a good habit to get into as well.
Step #4
Step number four is check the board before you buy. This may seem obvious, but it is probably the one of the most important steps. Let me explain. So check for flatness before you check out, before you buy. Look down the board. If you don't know, sight down the board and look for warps or twists and obvious cracks and knots in your usable area. I recommend do not buy anything that's cupped or twisted. And I had the thought when I was first starting is I could buy nasty boards and I could fix them. I have a planer. I have a joiner. However, I have learned that it is worth spending more money on stock that is just true and flat, and I can skip that step altogether.
All right, next. Moisture. Wood should be around 8% moisture content before you start working with it. And it doesn't come that way just from a cut tree. A cut tree can be anywhere from a newly cut tree can be anywhere from 40% to 60%. And what happens if you think about it when wood dries, it cracks, splits, warps. And we want to get that all out of the way before we start working with it.
So, here are three things to keep in mind when purchasing wood. Number one, buy wood from reputable sellers. This is why I do not recommend Facebook Marketplace, especially for beginners. Once you know what you're looking for, the questions to ask, then it's okay. But I would actually recommend go spend a little bit more money from someone that knows what they're doing and has their reputation is on the line. If they sell you a wet board, that's going to affect their reputation. Those are the people you want to buy from at first.
Number two is always allow wood to acclimate in your shop. So even though you buy it and it's dry from another place, bring it into your shop, let it set for 24 hours before you start working with it. Wood adjusts to the conditions, the humidity around it. And so that will help it get to a stable. You want its movement to move while it's a solid piece, not after you cut a tray and then it moves. So, keep that in mind.
Number three, if you're not buying from a known seller, you need to ask when the tree was cut down, how long it's been drying, and has it been kiln dried. Those three questions will save you a ton of time and money. So keep in mind if it's been air dried, it needs to be dried one year for every inch of thickness is the rule. So, if a tree's cut down and it was cut into 2 inch thickness, that board needs to air dry for two years for it to get down to around that 8% moisture content to be able to start working with it.
Thanks so much for reading and I will see you next time. Bye!