I Turned a Blank Wall Into a Giant Glowing Charizard
My friends just opened a brand new location for their comic shop, and they asked me to make something epic for their game room wall. This project had me designing five completely different pieces before landing on the right one. I hit problems during the build, ran into paint mix-ups during assembly, and rolled with the punches along the way.
But the end result was well worth it. Here's what happened.
The Brief
They wanted a focal point. A game room centerpiece that would make people walk in and immediately feel the energy of the space. The shop is filled to the walls with comics and has the atmosphere to match. Now they trusted me to create something that lived up to that same expectation.
No pressure, right?
Five Designs, One Winner
I spent about two weeks bouncing between ideas. I started with Pinterest and AI for inspiration, but translating that into something that actually worked for their space was the hardest part of the entire project.
Design One: Comic Pow Scene
I designed a classic comic-book "POW" style piece in Vectric. It looked cool at first, but once I visualized it on the wall, it felt busy and too complex. Scratched.
Design Two: Ninja Turtle Scene
Next, I tried a Teenage Mutant Ninja Turtles design. But as I started mapping out the layers and pieces, it became clear I'd need too many parts, too many separate elements to cut and align. The build was going to be a nightmare. Axed.
Then a few more ideas that just... didn't click.
But somewhere in there, I realized something important: everything I was making felt like a decoration, not a focal point. So I simplified.
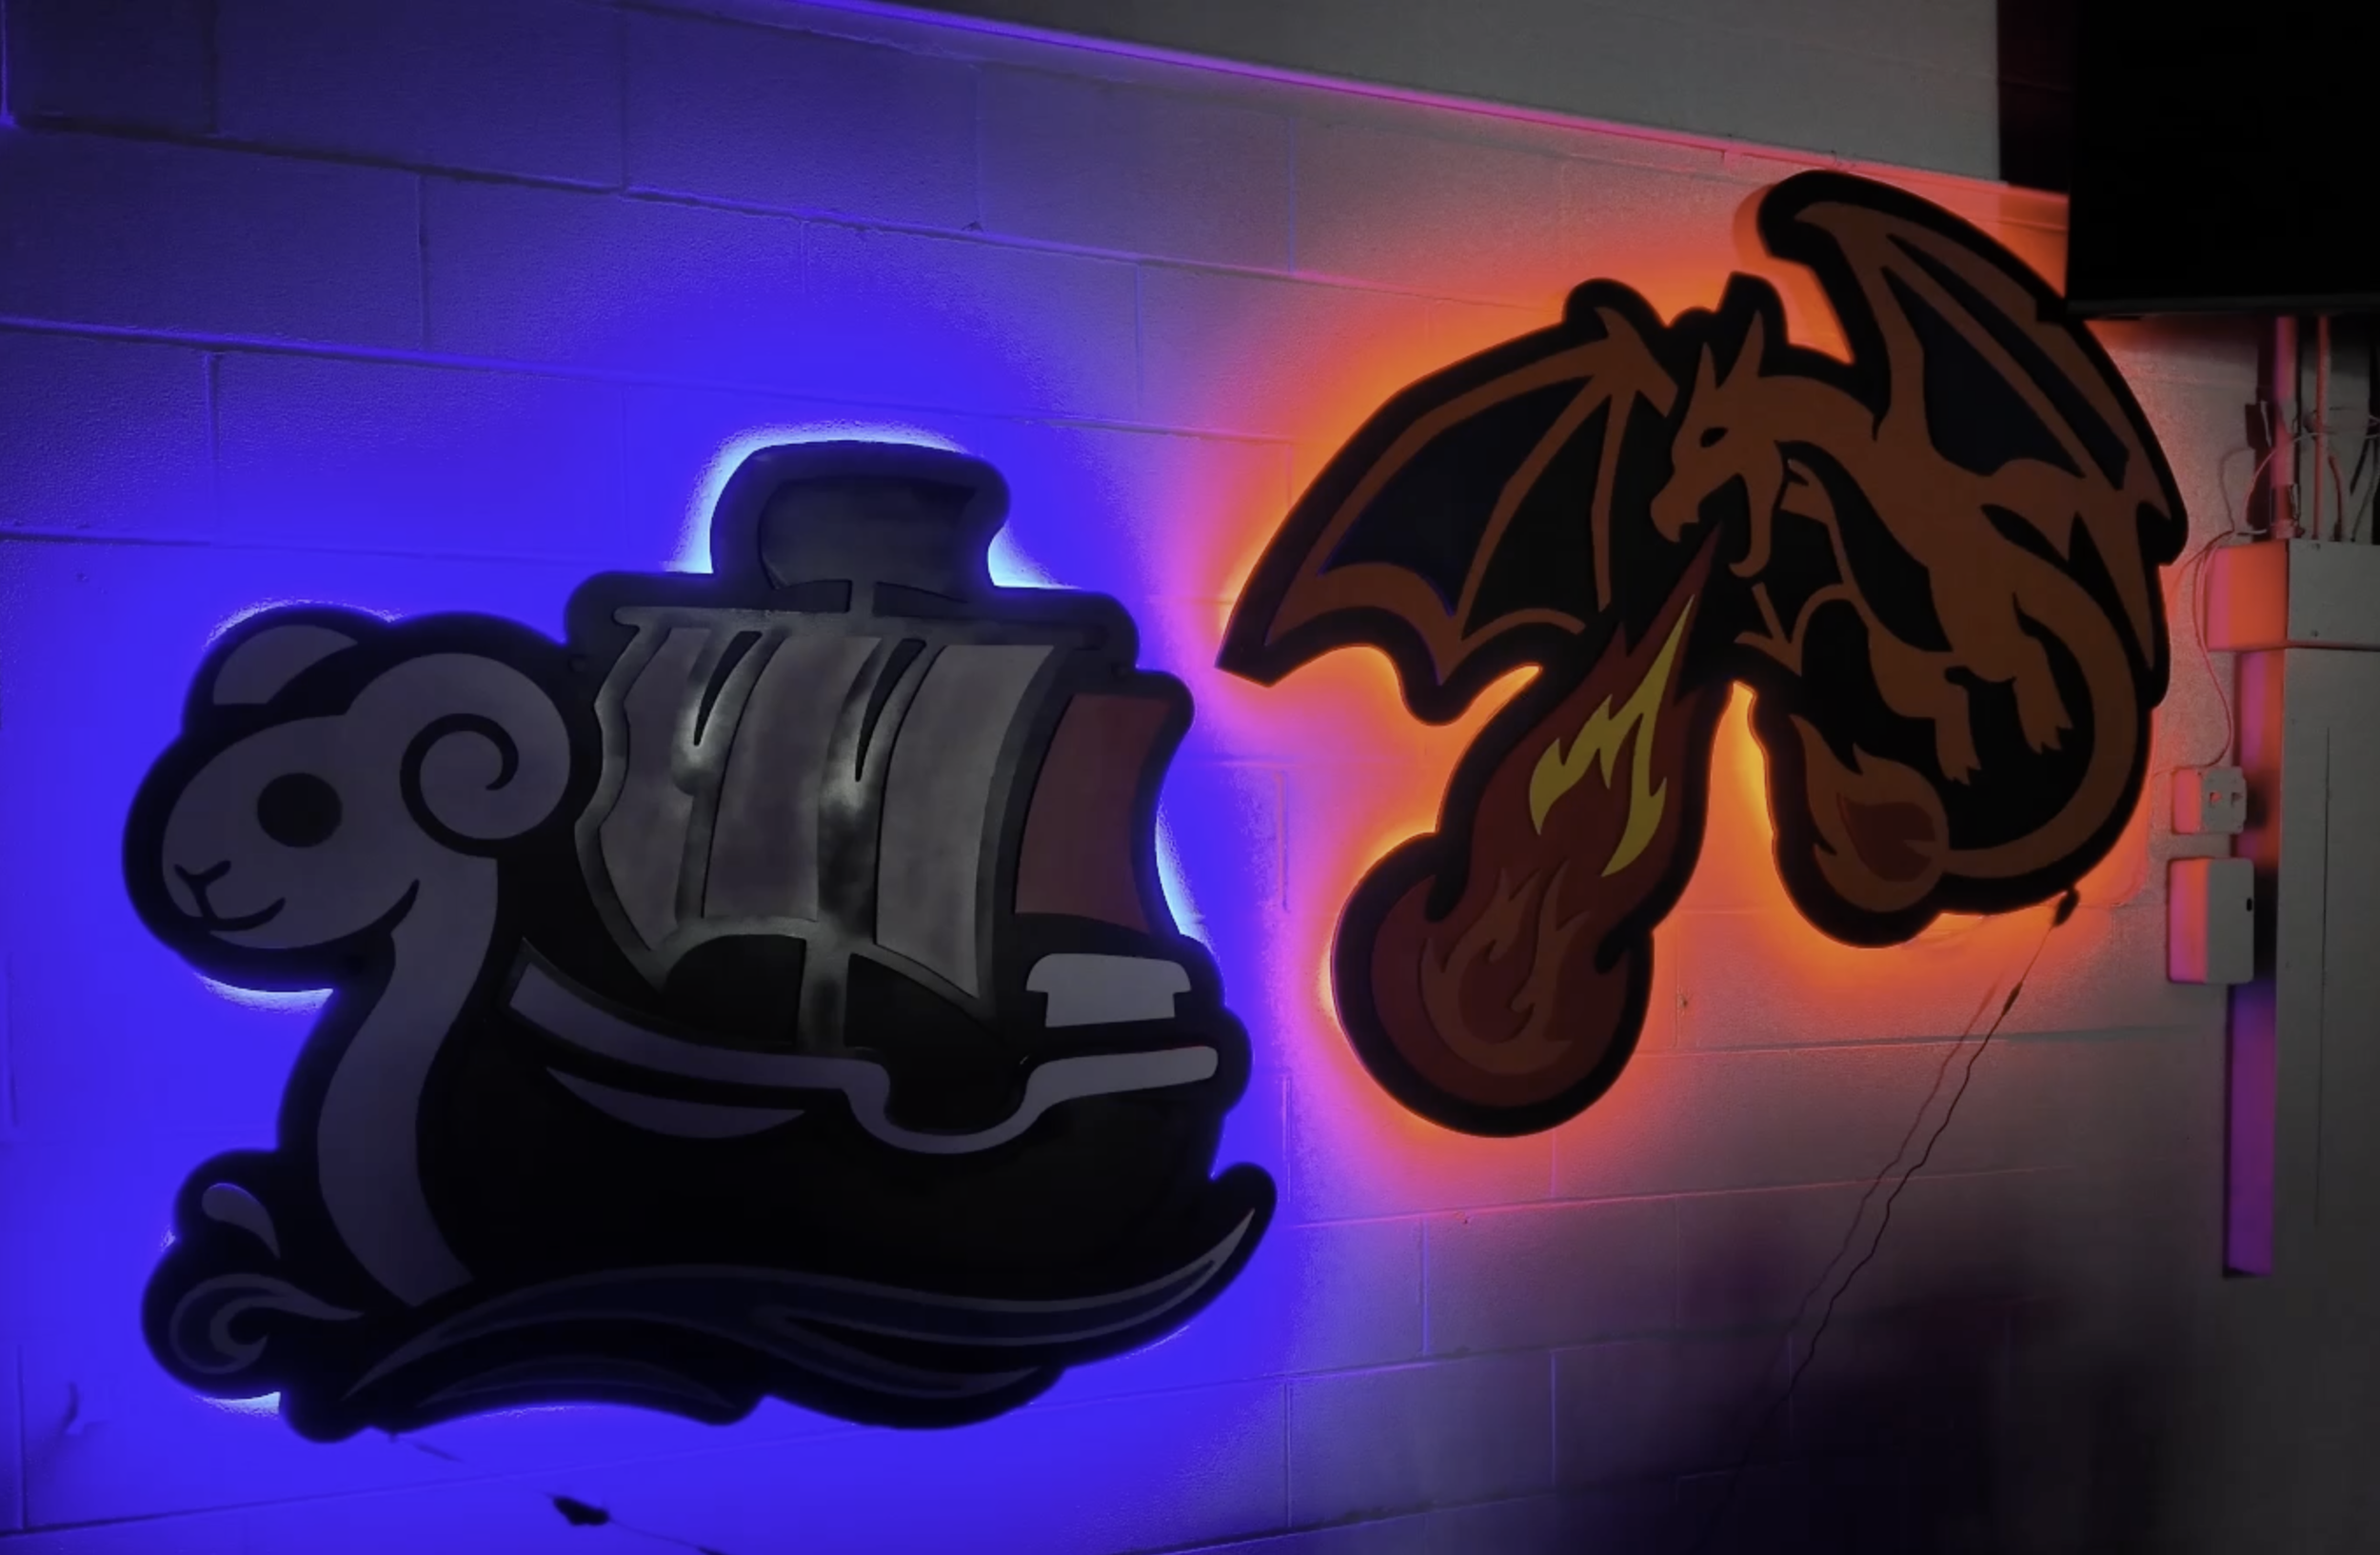
The two biggest games in the shop were Pokémon and One Piece. What if I took the most iconic characters and put them in direct conflict? Charizard facing off against the Going Merry.
Simple. Oversized. Designed to actually fill the space. Once I saw it, I knew this was the one.
The CNC Build
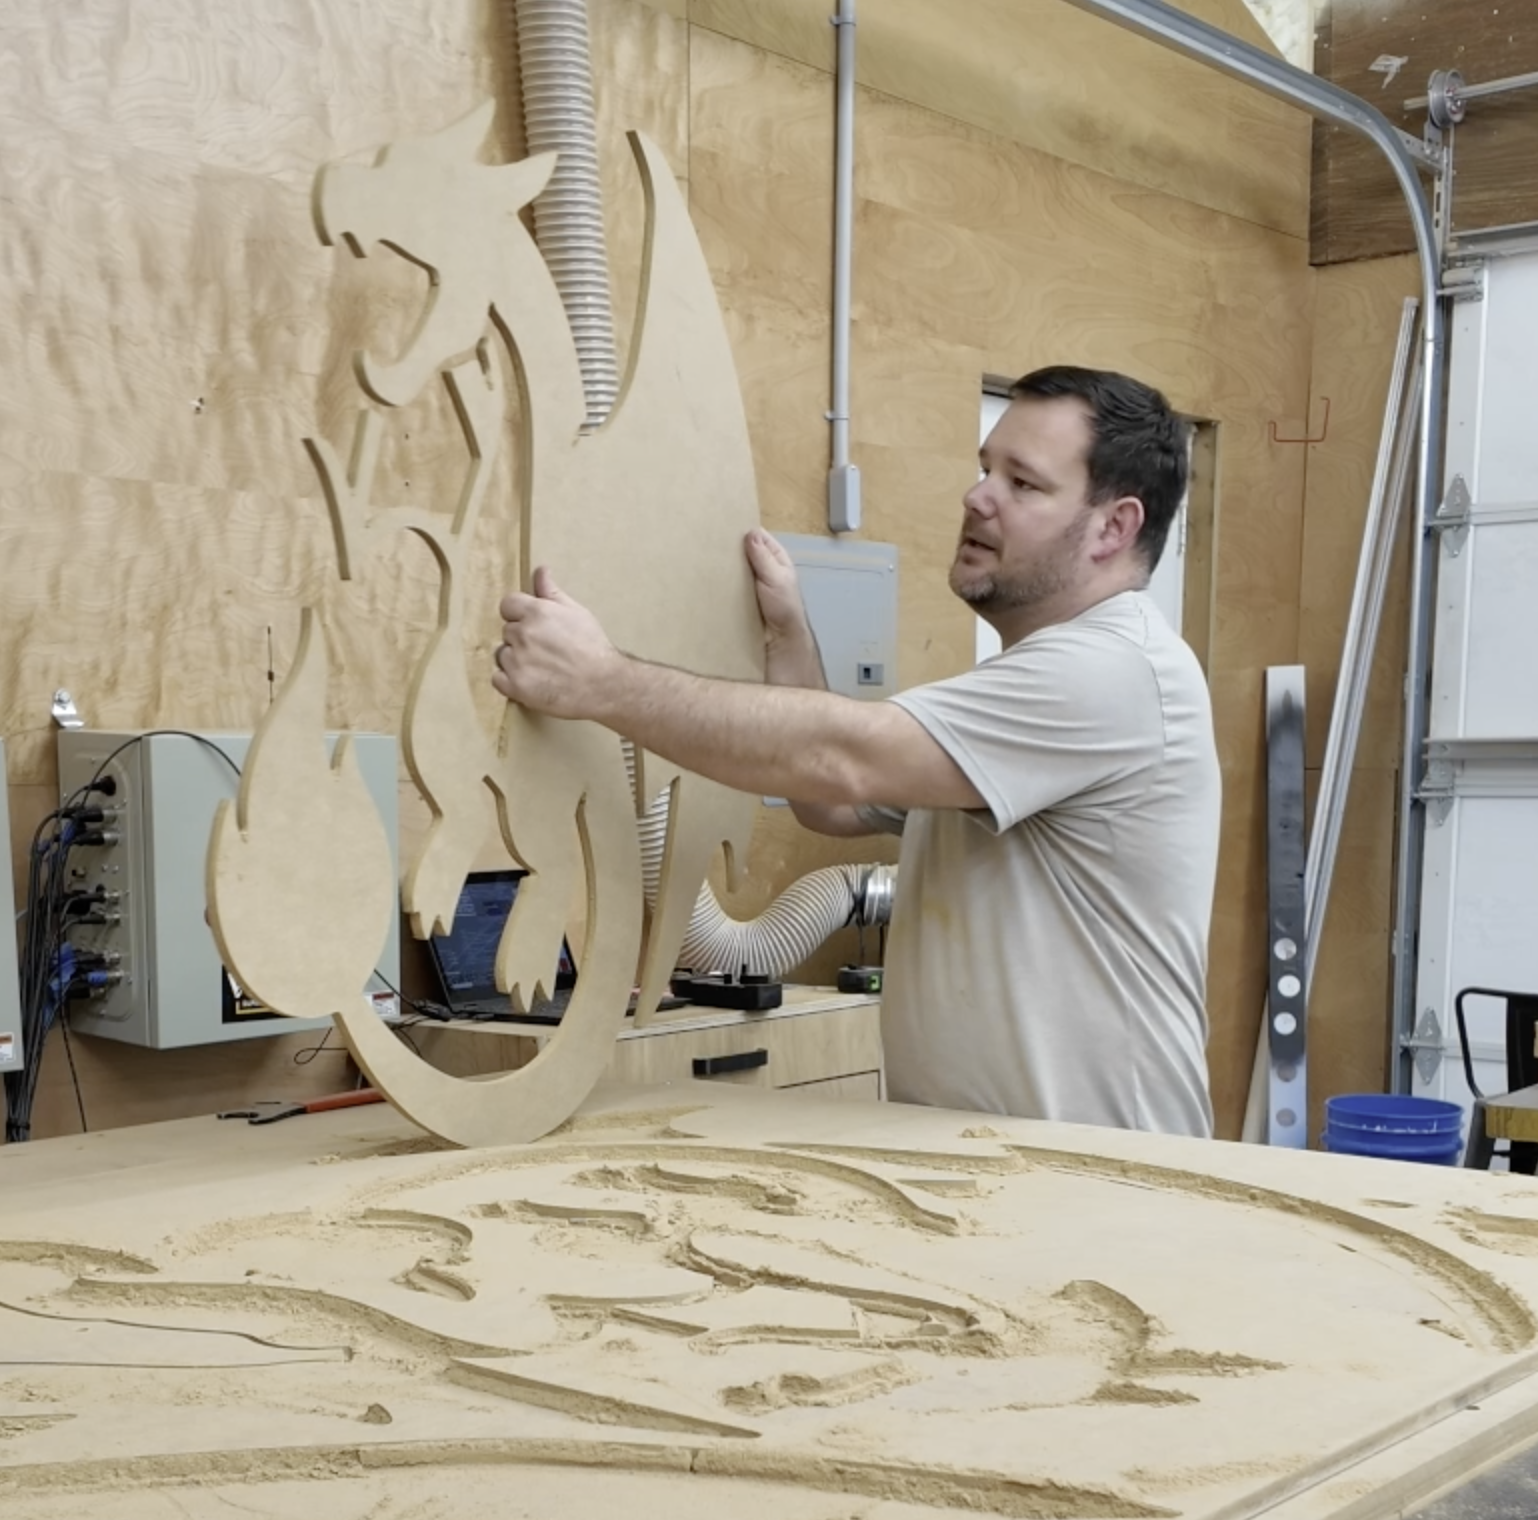
Machine homed. Zeroed. Three sheets of MDF to cut, full depth passes. Let’s go!
The Compression Bit Win
One thing I noticed immediately: the compression bit made a huge difference. These cuts came out clean. No splinter, no tear-out on either side. For a project like this where you could easily spend days sanding, this bit was worth its weight in gold.
I also nested all the pieces in Vectric to maximize material usage. Fit as many as I could on each sheet, which meant fewer scrap runs and less waste.
The Z-Depth Lesson (User Error)
On sheets one and two, I noticed the back edges weren't cutting cleanly. I was only using four corner screws to hold the MDF down, and the further away from those hold-downs, the more vibration and lift.
So before my third sheet of MDF I realized the problem: my Z depth was off by an eighth of an inch. Somehow I'd made mistake somewhere. The depth-of-cut matters a lot when you're using a compression bit—the top portion cuts down, the bottom cuts up. Go too deep and the bottom becomes a downcut, which messes things up.
So I reset the Z, re-homed, and ran sheet three.
Clean cuts on both sides. Problem solved.
Moral of the story: Depth of cut matters. A small adjustment saved me from spending extra time sanding.
Paint & The Spray Revolution
By hand, painting was taking forever. Hours for pieces that should've taken minutes.
So I upgraded to spray painting.
The difference was night and day. I primed and painted entire large pieces in less than 4 minutes with a sprayer. The sprayed primer also looked smoother and more even than the rolled-on stuff.
But I made a rookie mistake: I painted the wrong side on a few pieces. In hindsight, I should've laid everything out as it would be assembled before I started painting, then marked which sides needed paint and which didn't.
I also might have noticed a color issue as one of the wings I painted blue should've been orange. That meant a trip back to Lowe's for another can of spray paint. (Wasn't my first Lowe's trip for this project… or my last.)
Assembly
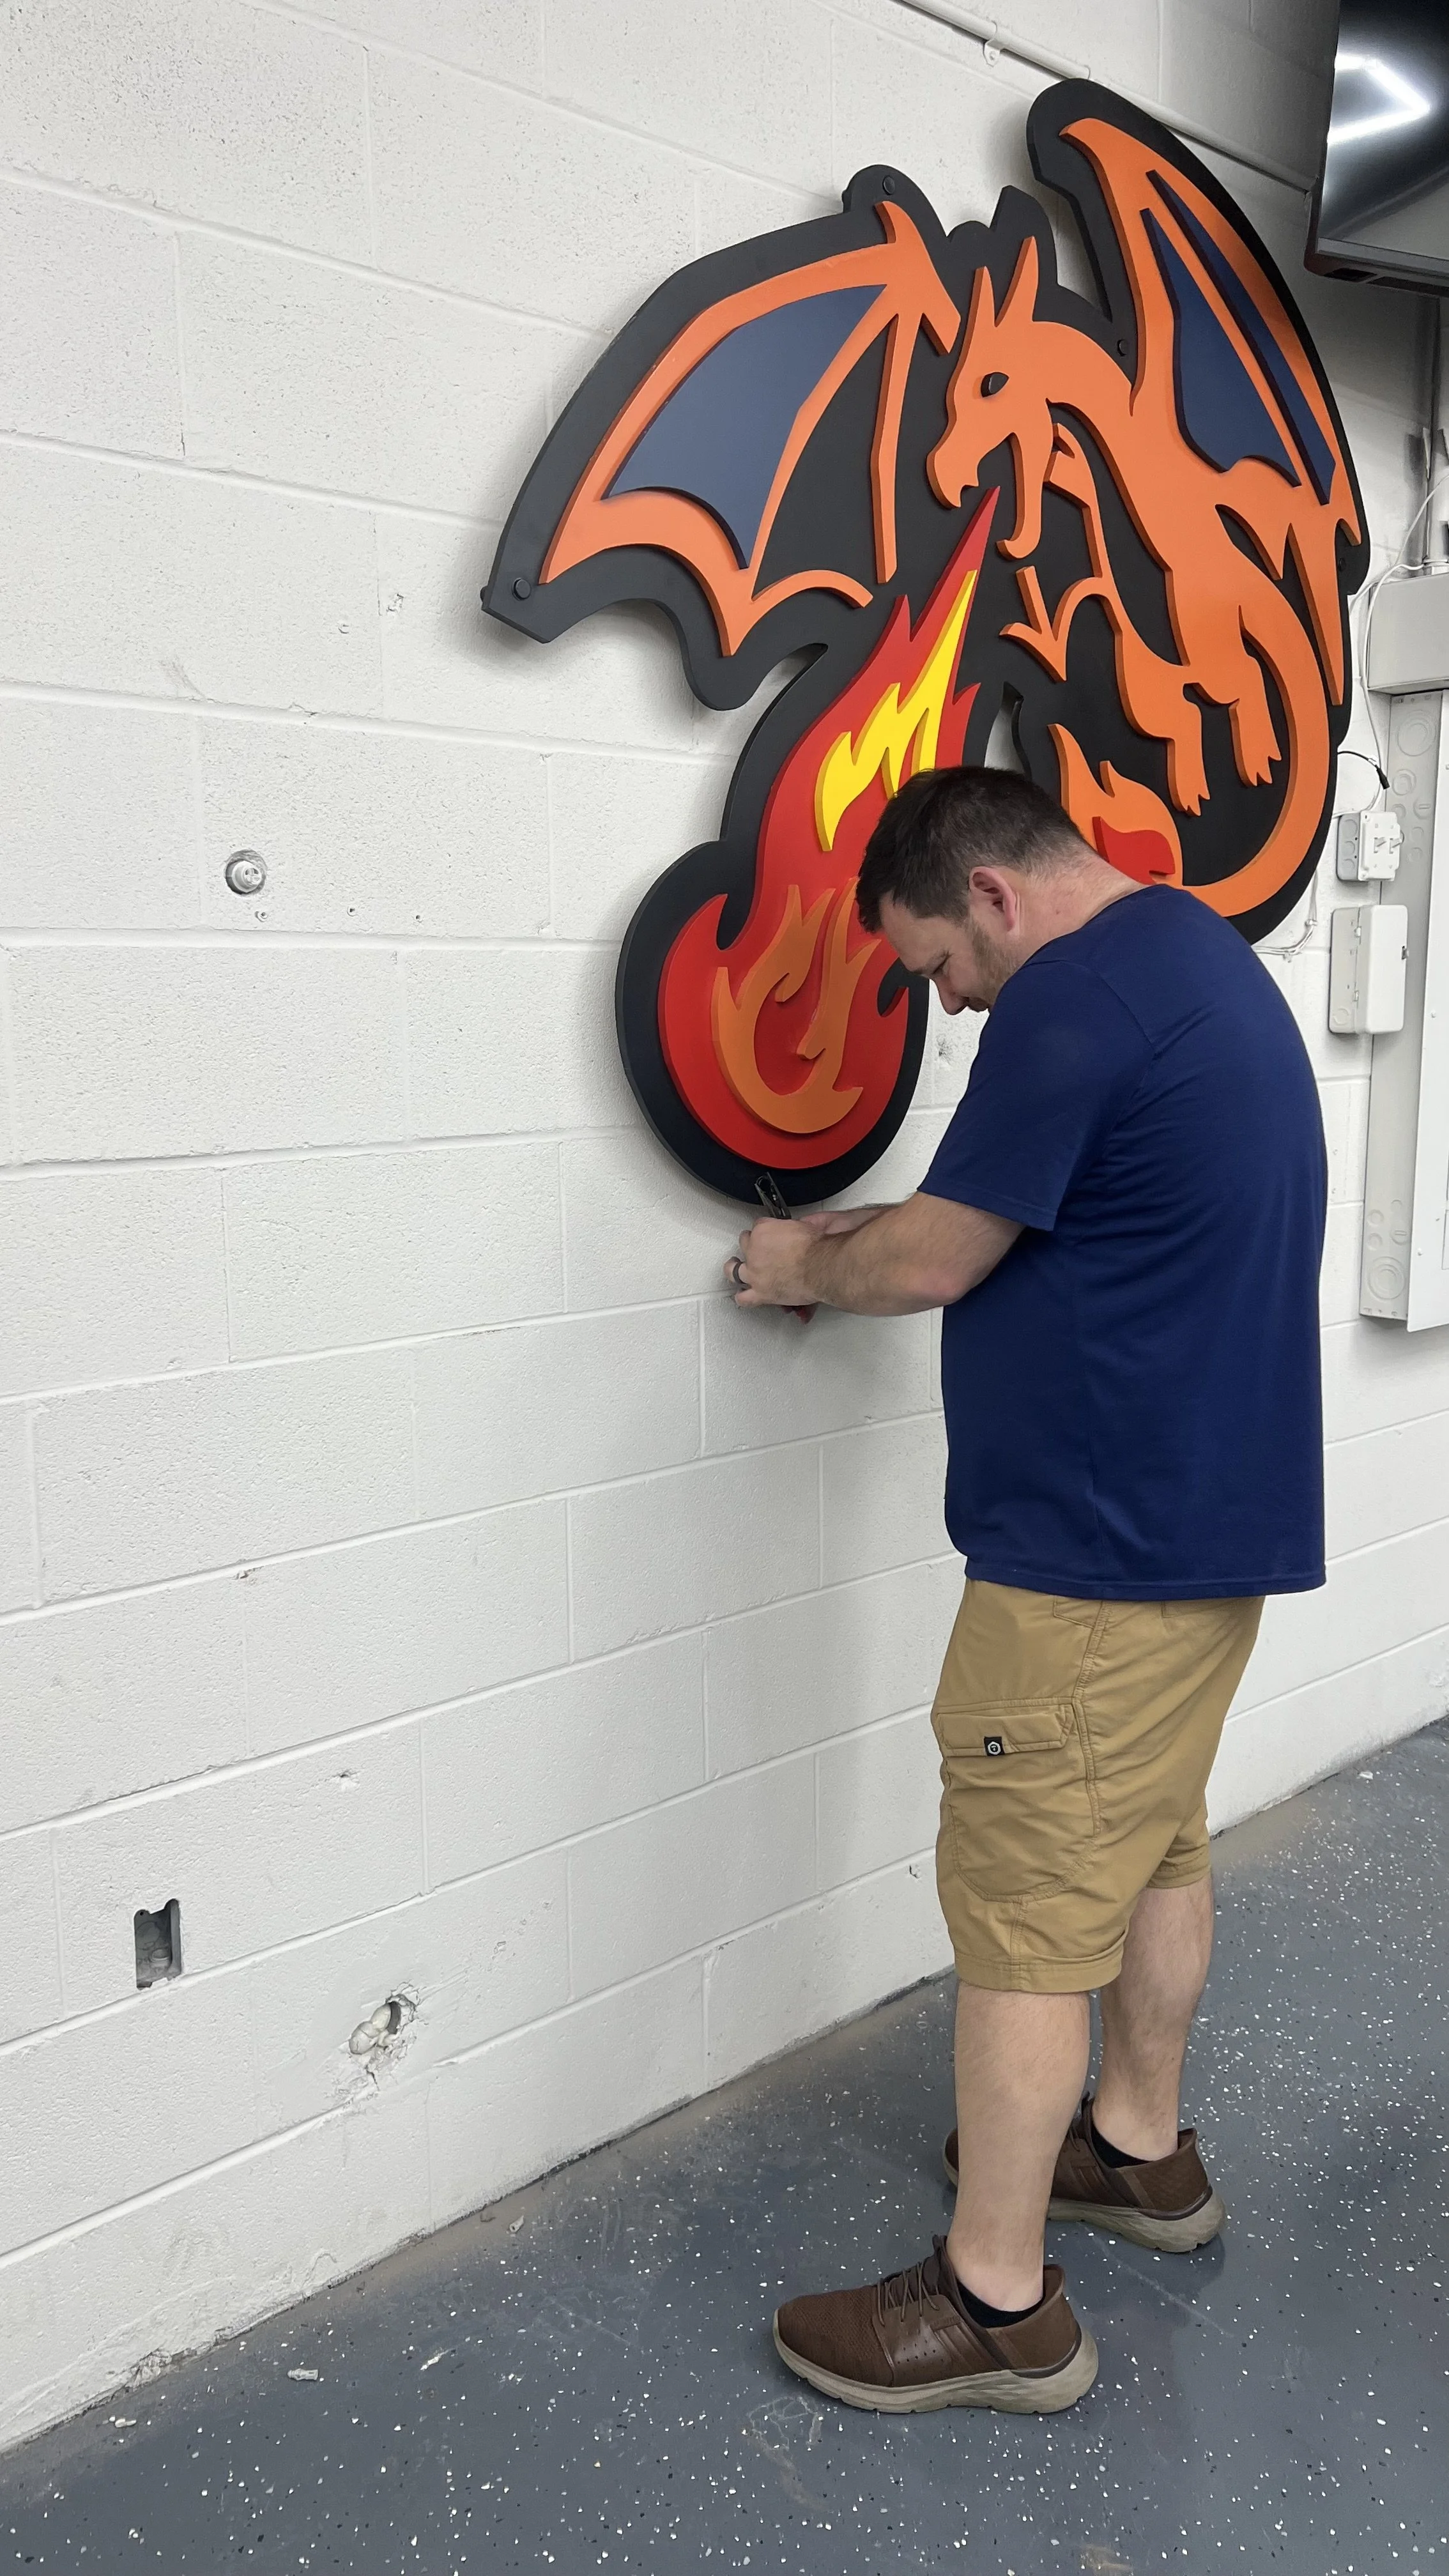
Once all the pieces were cut and painted, it was time to layer them up using CA glue (high-performance super glue) and accelerator. Getting the layers lined up so the final image actually looked right was nerve-wracking.
But here's where the design got better: as we were assembling, I looked at the Going Merry and thought it looked flat in certain spots. So Eric and I decided to add some sails. Some new shapes offset from the existing sail vectors, painted a khaki color.
It worked. The sails added visual weight and depth to the top portion of the piece.
The Standoff Problem
Once everything was assembled and finished, I needed to hang it. I planned to use 2-inch standoffs and 3/8-inch bolts drilled through the wall into concrete.
But here's what I didn't account for: the MDF thickness only gave me about 1/4 inch of material to work with. Not enough clearance for those standoffs to screw in properly, especially for something that probably weighed 50-75 pounds.
I spent an hour looking for different standoffs that would work on a two-day timeline. Couldn't find them.
So I went with a workaround: I used a Forstner bit to counter-sink the screw heads slightly, just enough to give myself a little more clearance. Risky on an already-painted piece, but necessary.
It worked. A little touch-up paint and we were good.
The Reveal
On site, we marked the holes, drilled into concrete, installed the anchors, and carefully lined everything up.
(Pro tip from Dr. Max: when you're pounding cheap wall anchors into concrete, screw the bolt partway in first, then hammer. It works perfectly.)
And then... we hung it.
Walking back to see the final result lit up on the wall?
The added LED lights on the back to give the Going Merry that water glow and the red fore look behind Charizard really brought the whole thing to life.
That moment was worth every iteration, every trip to Lowe's, and every hiccup along the way.
What I Learned
Design simplicity wins. Five complex ideas lost to one oversized, straightforward composition.
Compression bits are game-changers for clean cuts on both sides of the material.
Z-depth matters. That small adjustment prevents time sanding.
Spray painting saves time (and sanity) compared to hand painting large pieces.
Lay it out before you paint. Mark which sides need color to avoid rework.
Plan your hardware before you design. The standoff problem could've been solved in the initial layout phase.
Precision is worth the stress. When you're making a standout item that will be a focal point, getting it right matters.
I spent 10x more time designing this than I did cutting it. But that's the way it should be. The machine part of the project is fast. Figuring it out is what takes the real time.
My friends now have an epic focal point in their game room.